Recognizing things with the Custom Vision Service
At Build 2017 Microsoft demonstrated the Custom Vision Service. This extremely cool service enables you to identify your own objects and things in images. It is easy, just upload a set of 6 to 12 images, hit the train button and start calling the REST API.
The Custom Vision Service is part of the larger Azure Cognitive Services collection. The best use case for this tool is if you have a specific collection of unique things. If you just want to detect common things in images you can better use the Computer Vision API.
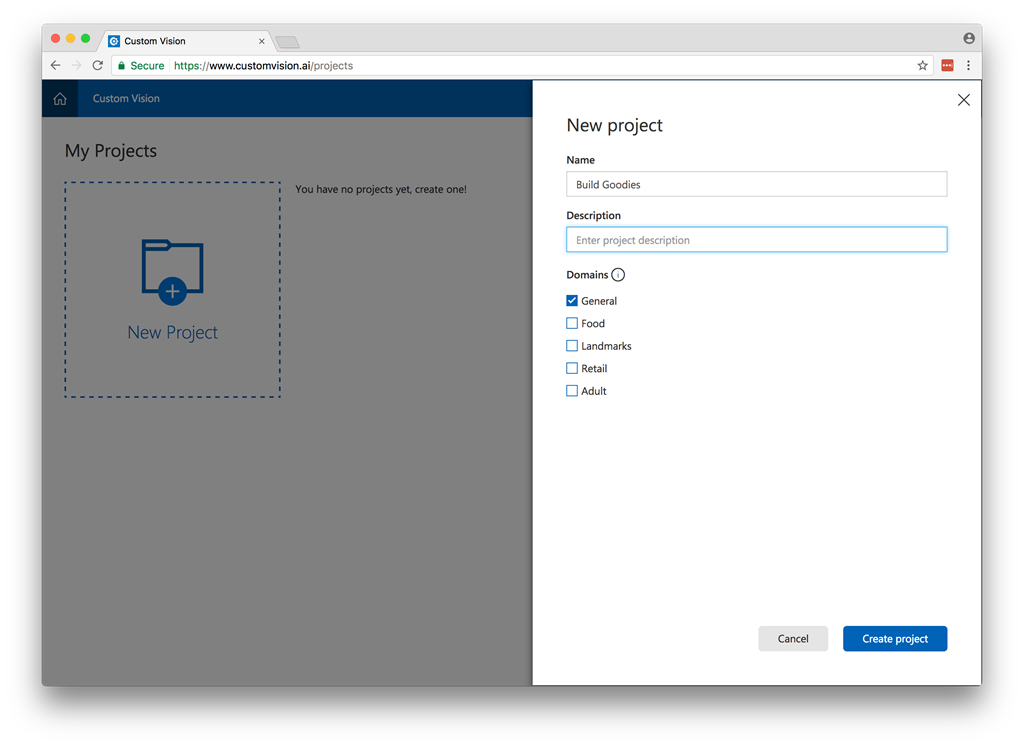
Step 1 – Login and create a new project
Go to the website: customvision.ai and login with a live account. In this sample, I will train a model that can recognise the goodies we got a build. After login create a new project, give it a name and choose the correct domain. If you are not sure about the domain, the general domain will always work.
Step 2 – Upload a set of images
Next upload your set of images. For the model to train well make pictures from the object from all different angles. The more the better. After uploading give the images some tags.
Download my image set

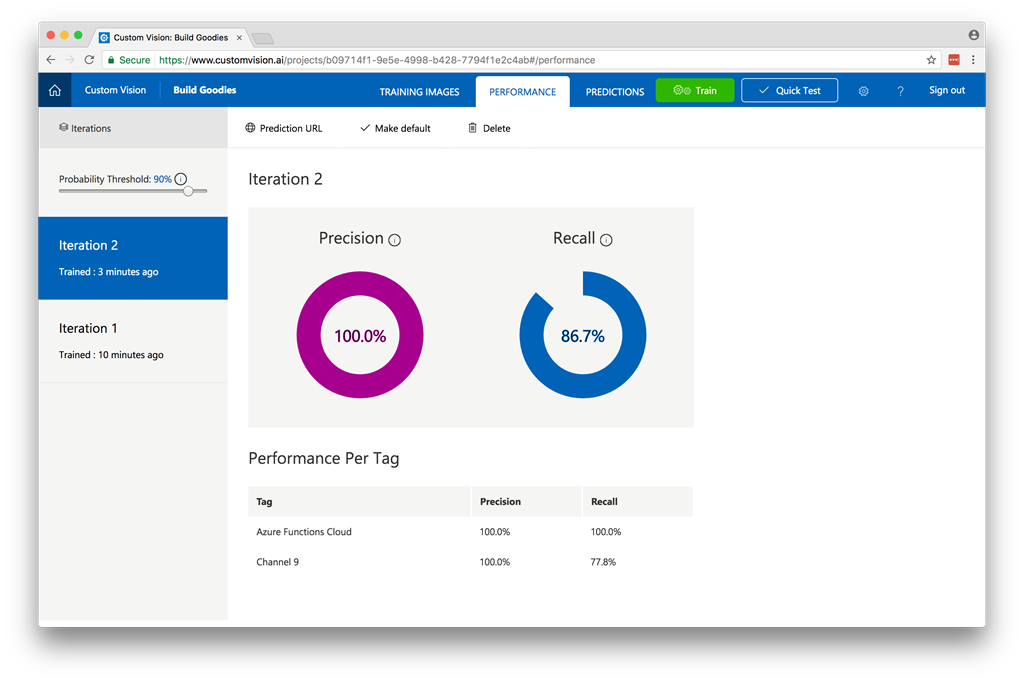
Step 3 – Train your model
Next click the Green Train button. It takes a only a few minutes to train your first model. After training you will see to 2 graphs that give you information about you model.
Precision When you classify an image, how likely is your classifier to correctly classify the image? Out of all images used to train the classifier (dogs and ponies), what percent did the model get correct? 99 correct tags out of 100 images gives a Precision of 99%.
Recall Out of all images that should have been classified correctly, how many did your classifier identify correctly? A Recall of 100% would mean, if there were 38 dog images in the images used to train the classifier, 38 dogs were found by the classifier.
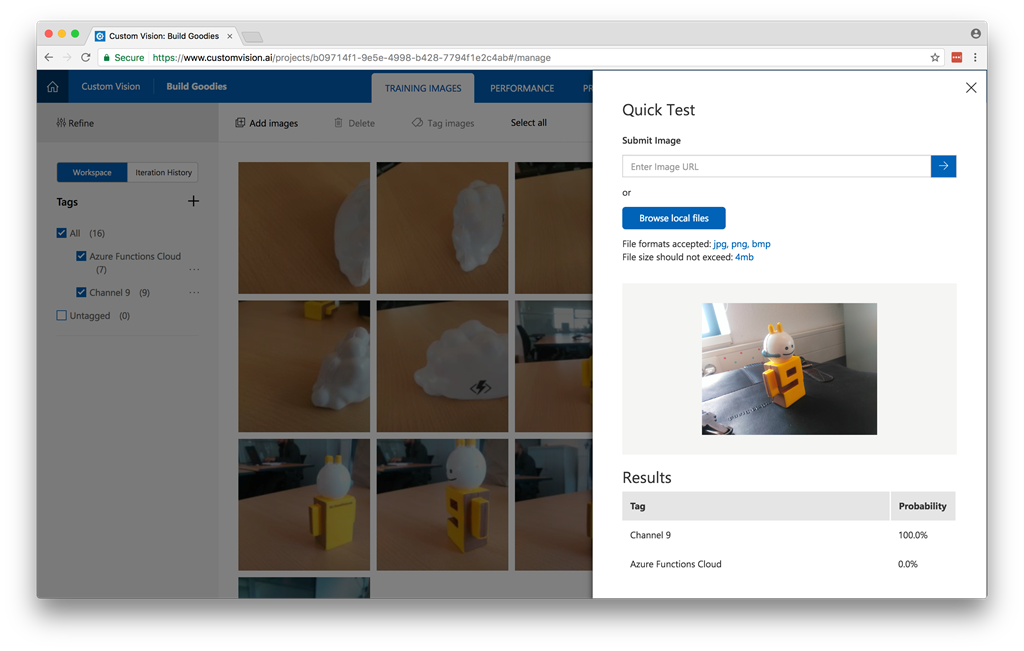
Step 4 – Validate your model.
Next you can do a quick test to validate if the model is working.
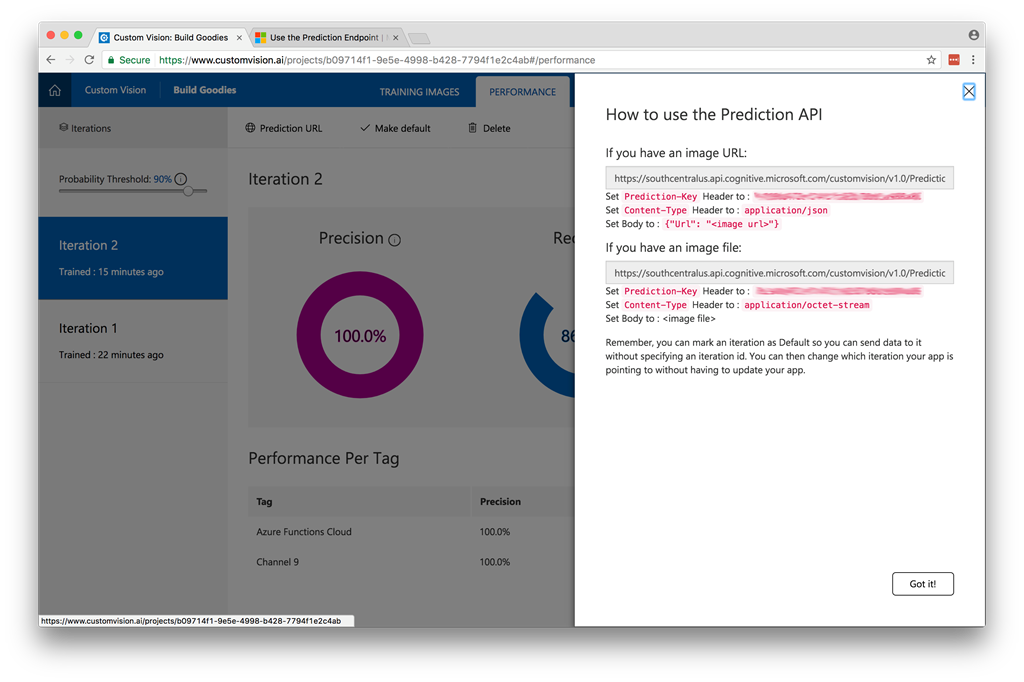
Step 5 – Connect to the API
Now the model is trained we can use it in an application. To connect to your model, you must use the prediction API. This endpoint can be found under performance and the button Prediction URL. To connect to the endpoint, you must specify prediction key in the header and a iterationId. If you don’t send a iterationId it will use the default iteration. You can set an iteration as default this by clicking “Make default”.
Code sample can be found on Github
The code
When connecting to the API you can choose to send the url of an image or send the image as a byte-array.
static class Program
{
    private static string _predictionKey;
    private static string _predictionEndpointUrl;

    static void Main()
    {
        _predictionKey = "[Insert Prediction Key]";
        _predictionEndpointUrl = "[Insert Prediction Endpoint]";

        Console.Write("Enter image path: ");
        string filePath = Console.ReadLine();

        byte[] byteData = GetFileAsByteArray(filePath);
        MakeRequest(byteData).Wait();

        Console.WriteLine("\nHit any key to exit");
        Console.ReadLine();
    }

    static async Task MakeRequest(byte[] byteData)
    {
        using (var content = new ByteArrayContent(byteData))
        {
            var client = new HttpClient();
            client.DefaultRequestHeaders.Add("Prediction-Key", _predictionKey);

            content.Headers.ContentType = new MediaTypeHeaderValue("application/octet-stream");
            HttpResponseMessage response = await client.PostAsync(_predictionEndpointUrl, content);
            Console.WriteLine(await response.Content.ReadAsStringAsync());
        }
    }

    static byte[] GetFileAsByteArray(string filePath)
    {
        FileStream fileStream = new FileStream(filePath, FileMode.Open, FileAccess.Read);
        BinaryReader binaryReader = new BinaryReader(fileStream);
        return binaryReader.ReadBytes((int)fileStream.Length);
    }

}
Besides connecting to the endpoint directly you can also use a the SDK.
Guid projectId = Guid.Parse("[Insert project ID]");
string predictionKey = "[Insert prediction Key]";
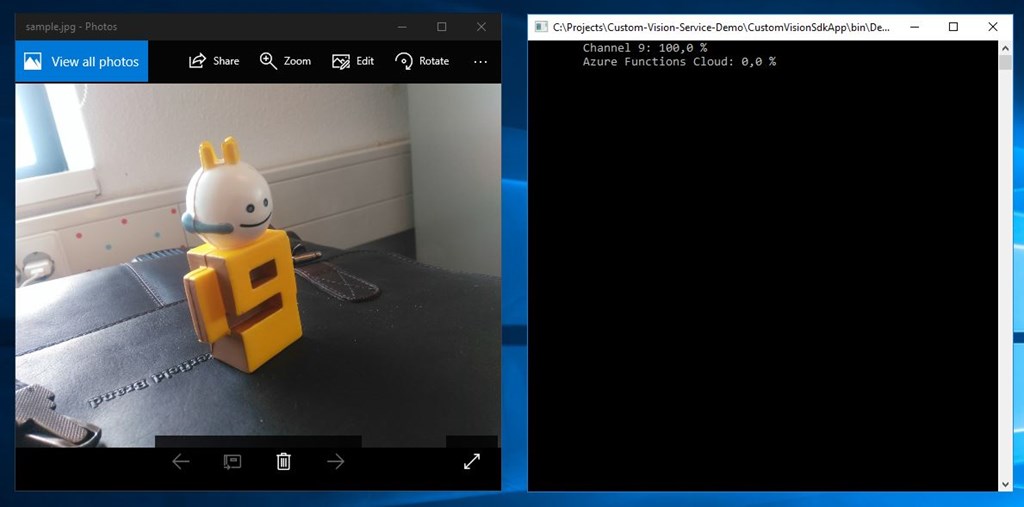
string imagePath = @"d:\sample.jpg";
MemoryStream testImage = new MemoryStream(File.ReadAllBytes(imagePath));
PredictionEndpointCredentials predictionEndpointCredentials = new PredictionEndpointCredentials(predictionKey);
PredictionEndpoint endpoint = new PredictionEndpoint(predictionEndpointCredentials);
ImagePredictionResultModel result = endpoint.PredictImage(projectId, testImage);
// Loop over each prediction and write out the results
foreach (ImageTagPrediction prediction in result.Predictions)
{
Console.WriteLine($"\t{prediction.Tag}: {prediction.Probability:P1}");
}
In a few simple steps the Custom Vision Services enables you to implement a computer vision model for your own unique things and with a simple API call is very easy to implement this in your applications.
The service is still in preview so there are some limitations 10 projects and 5000 calls. But you can try it for free!