Custom Vision on the Raspberry Pi (ONNX & Windows IoT)
Custom vision in the cloud that can be consumed through an API is available now for quite some time, but did you know that you can also export the models you create in the Cloud and run them localy on your desktop or even on a small device like a the Raspberry Pi?
In this article you will find a step by step guide on how you can train a model with the Microsoft Custom Vision Service. Export this model to a ONNX (Windows ML) model, which can run localy on your Windows Machine. When you have the model localy, we build a small UWP application and deploy that to a Raspberry Pi running Windows IoT core.
Have a look at the video below for the end result!
This guide consists of 3 steps
- Part 1 - Create your model
- Part 2 - Build the UWP App
- Part 3 - Run it on the RaspBerry PI 3
If you have any question or remarks, please connect to me on twitter of LinkedIn.
Part 1 - Create your model
In this first chapter we are going to create a model with the Custom Vision service from Microsoft and export the create model to a ONNX (Windows ML) so we can run it on the RaspBerry Pi.
1.1 Create your dataset
- Find 3 objects in the room like your watch, phone, mouse, cup or any thing that classifies as an object.
- Make at least 15 photos from these objects. Make sure you use different angles and backgrounds.
- From the 15 pictures per object, set 2 aside for testing your model.
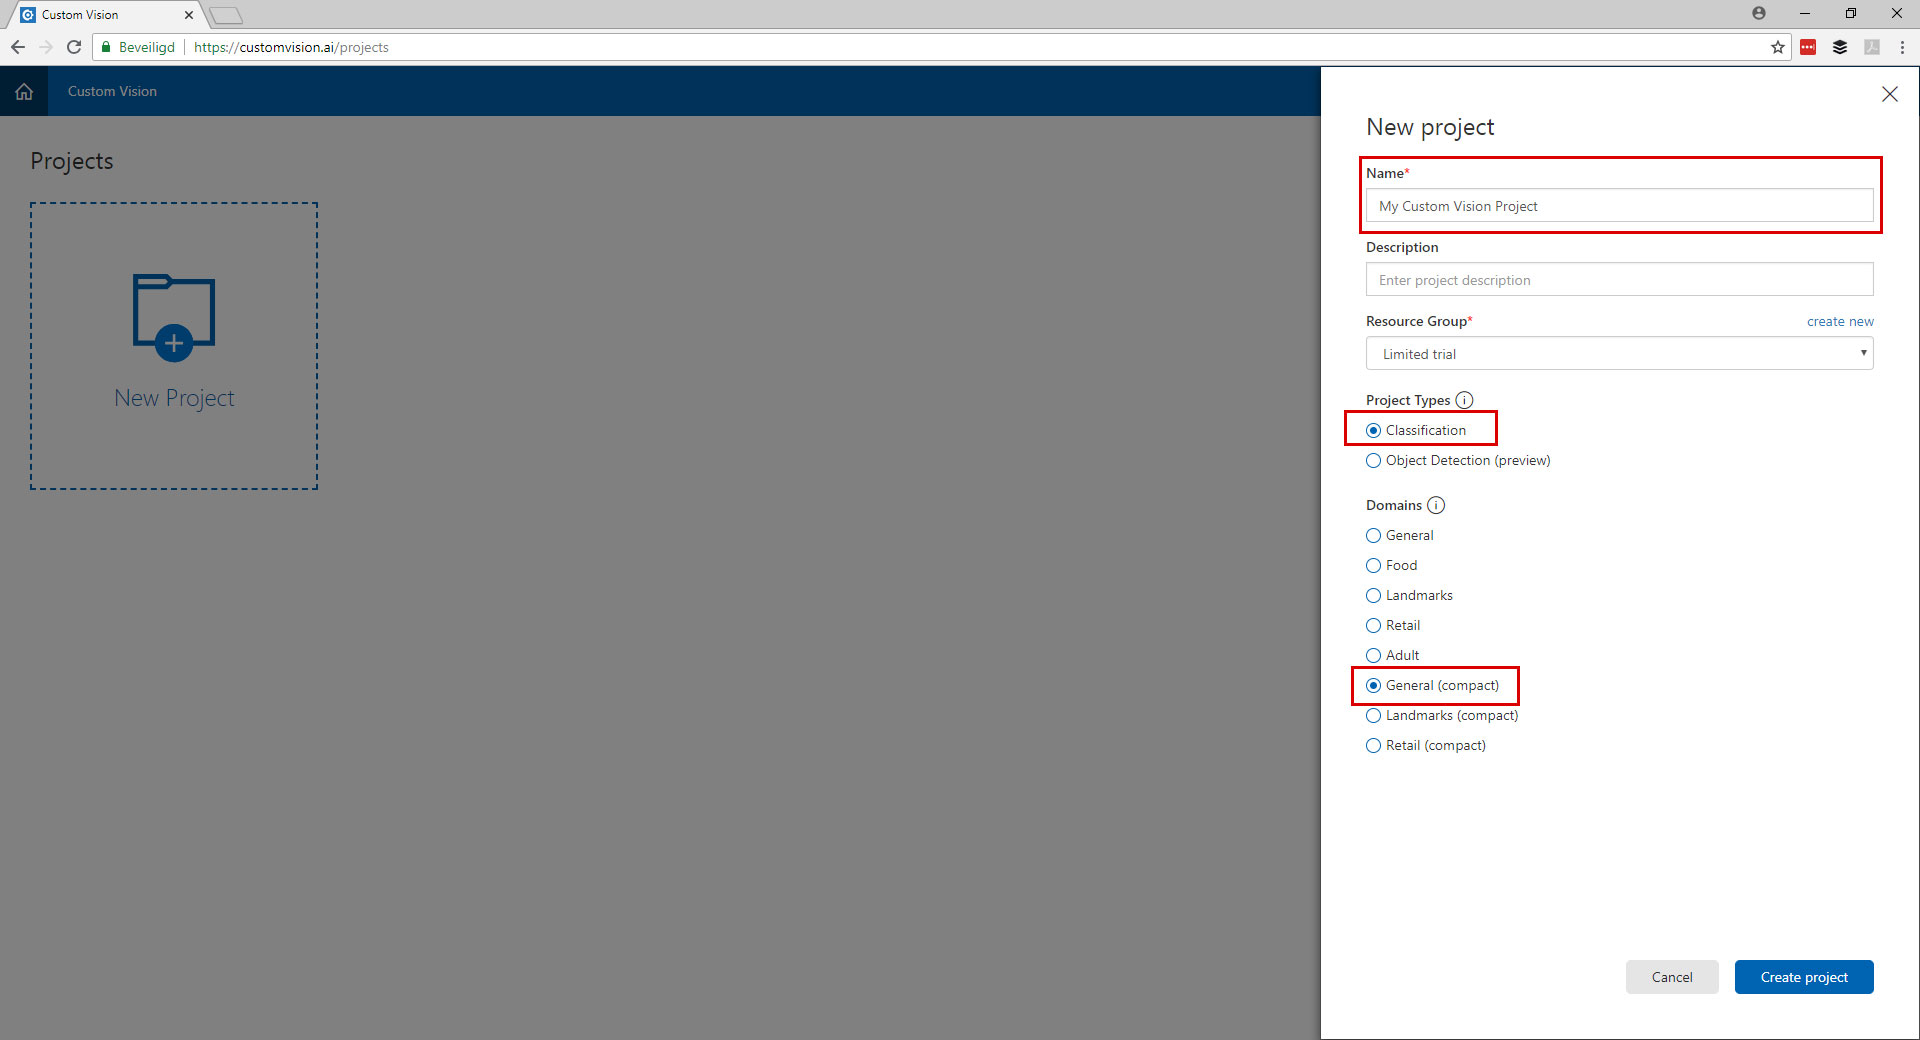
1.2 Create a new project
- Go to the website: customvision.ai and login with a Microsoft account.
1.3 Upload & Tag your pictures
After creating your project you can start uploading you images. The best way is to upload and tag your images per project.
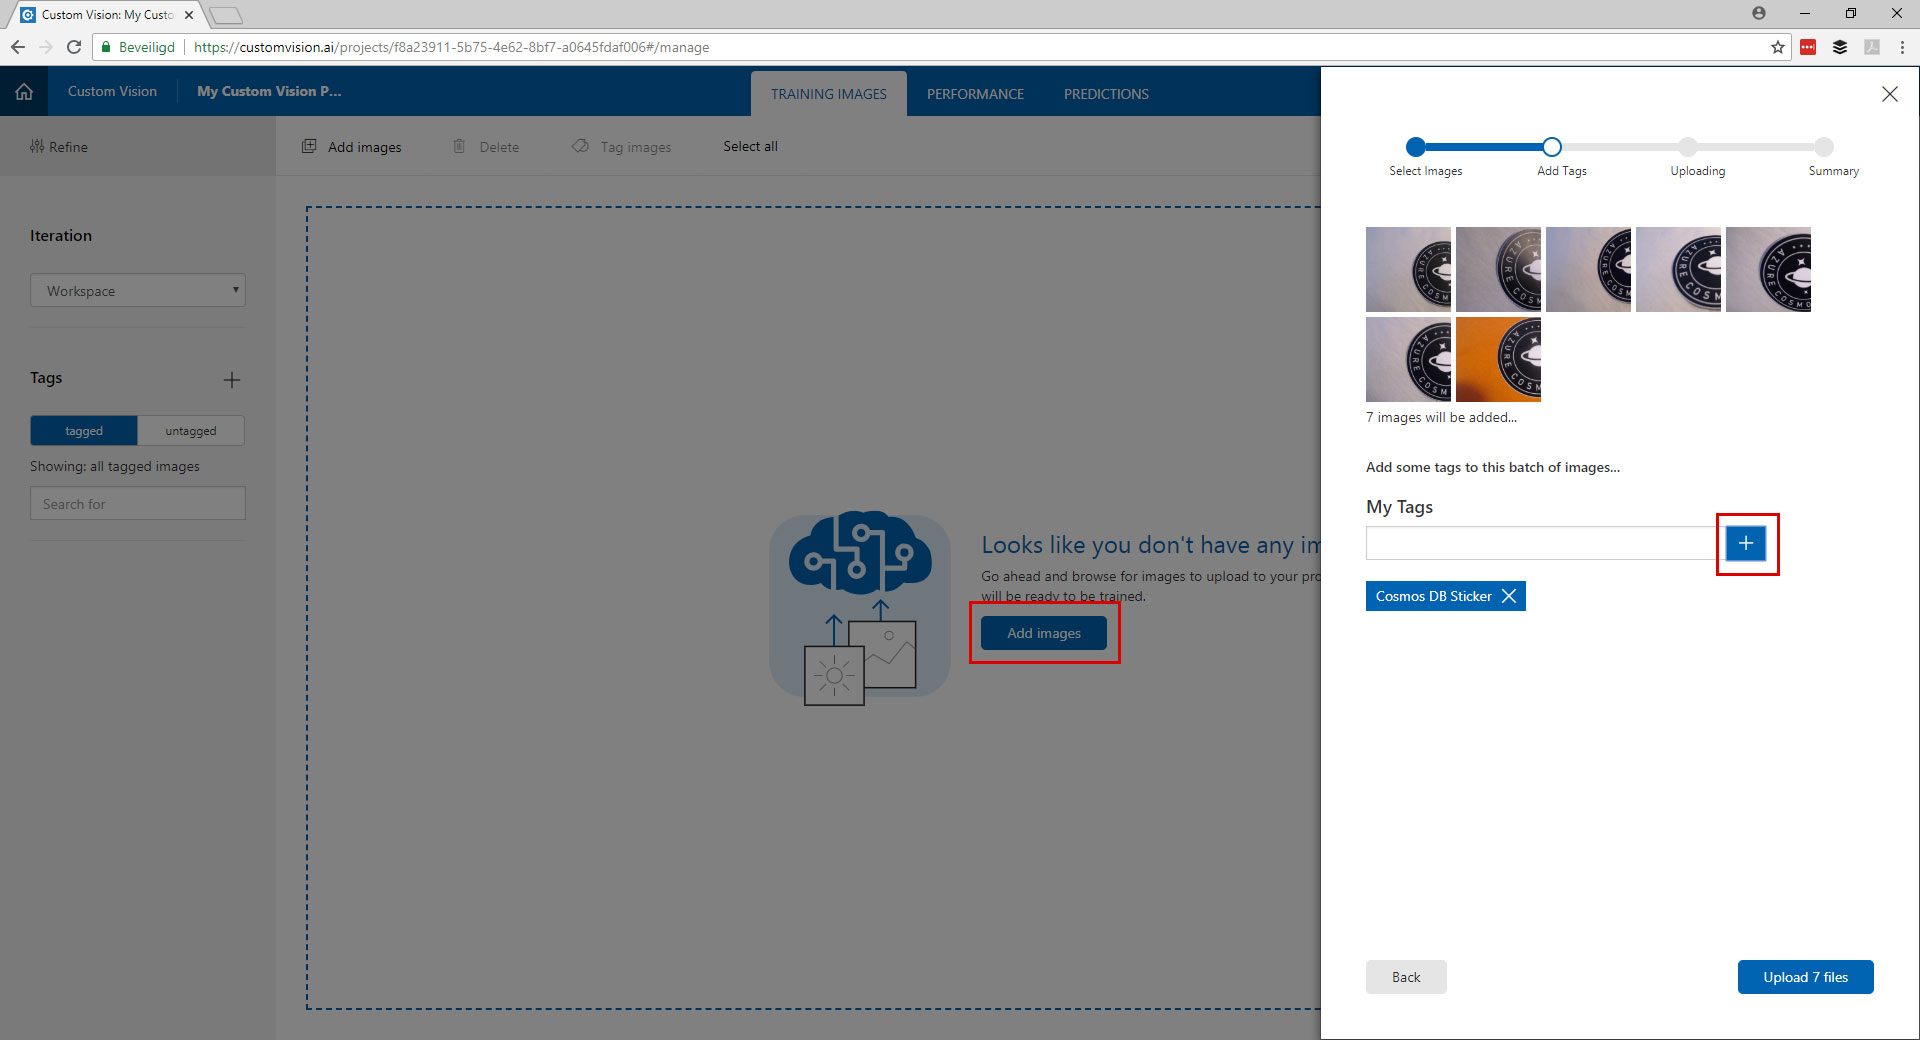
- Click "Add Images"
- Click "Browse some local files" (Can not exceed 4MB per image)
- Tag the images, type the tag and click on the + button
- Click the upload button
- Repeat these steps for all your objects
1.4 Train your model
Now it is time to train your custom vision model.
- Click in the top right on the green "Train" button
The training will take only a few seconds. When the training is done you will see the performance and recall of the model. This should be above 90% if not you have to take some better pictures ;)
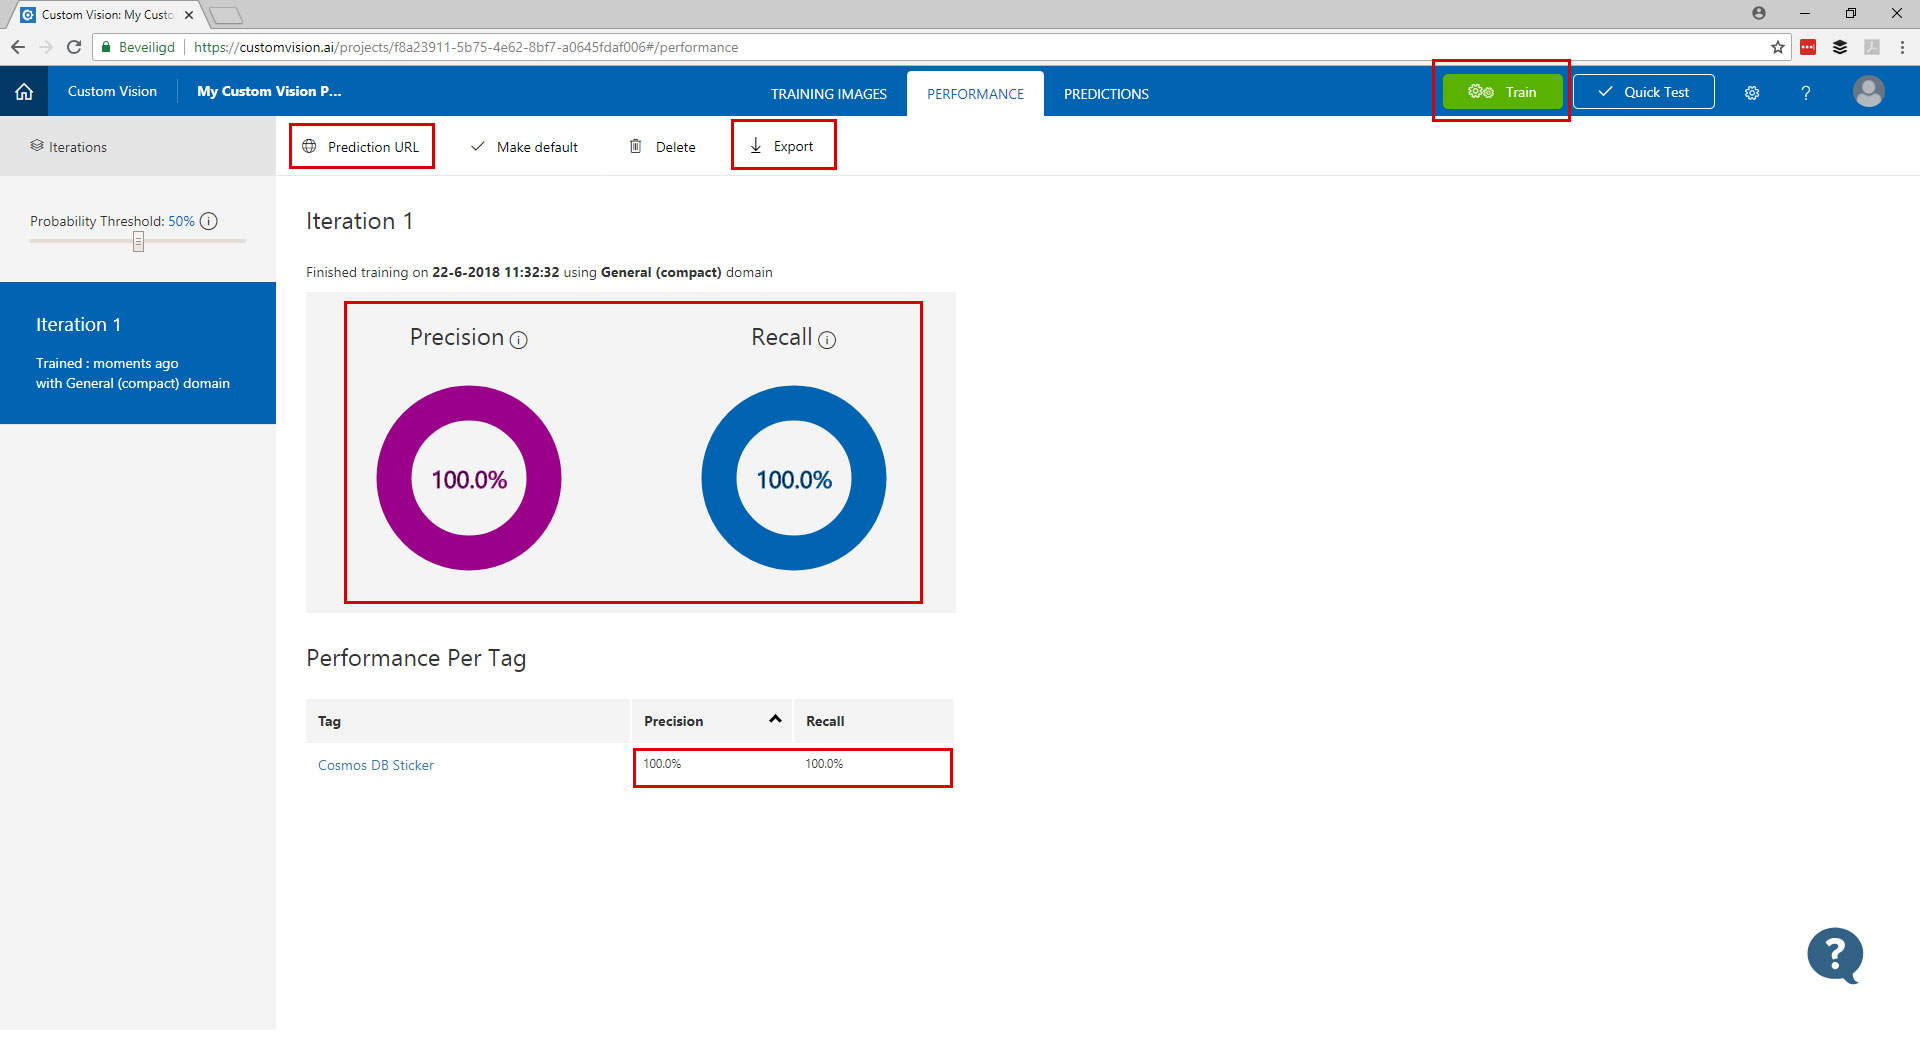
Have a look at this screen and see that here you can find the API Endpoint and export the model
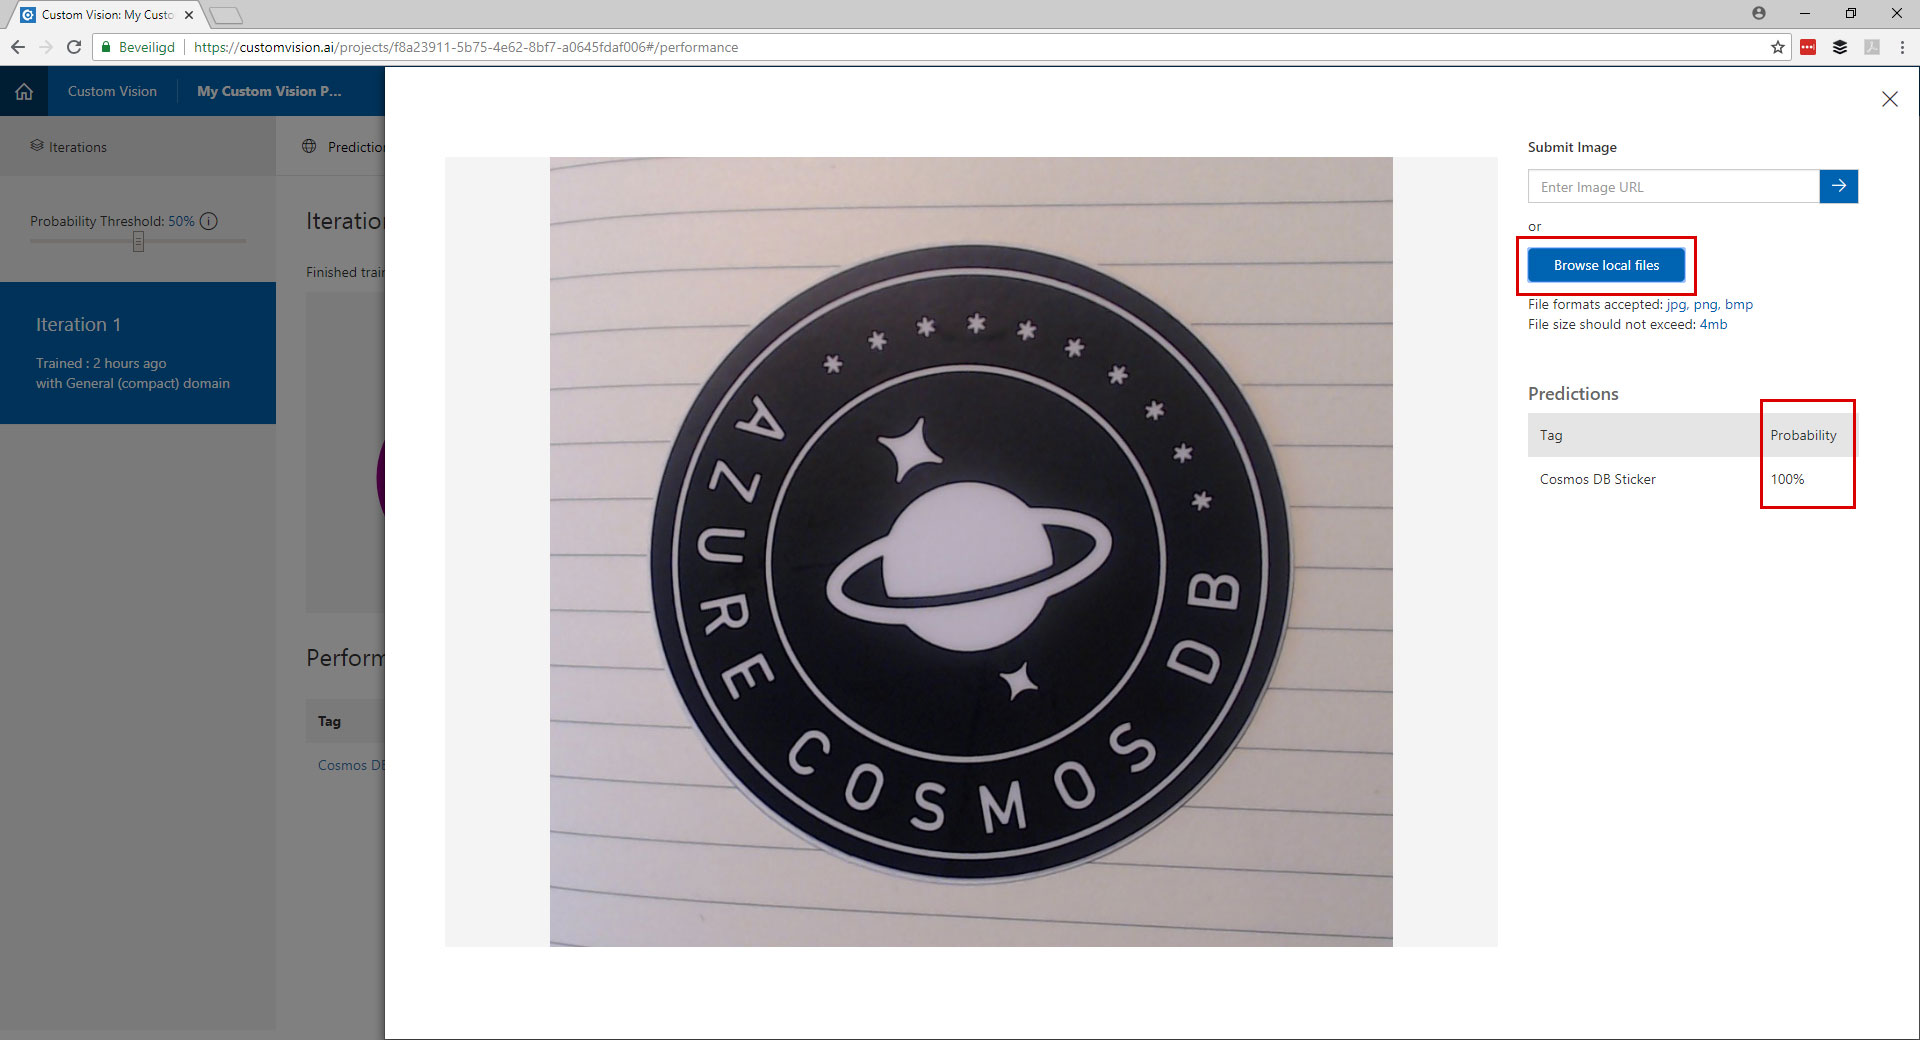
1.5 Test your model
Now you have trained the model it is time to test it.
Click the "Quick Test" button in the top right, upload an image and see the results!
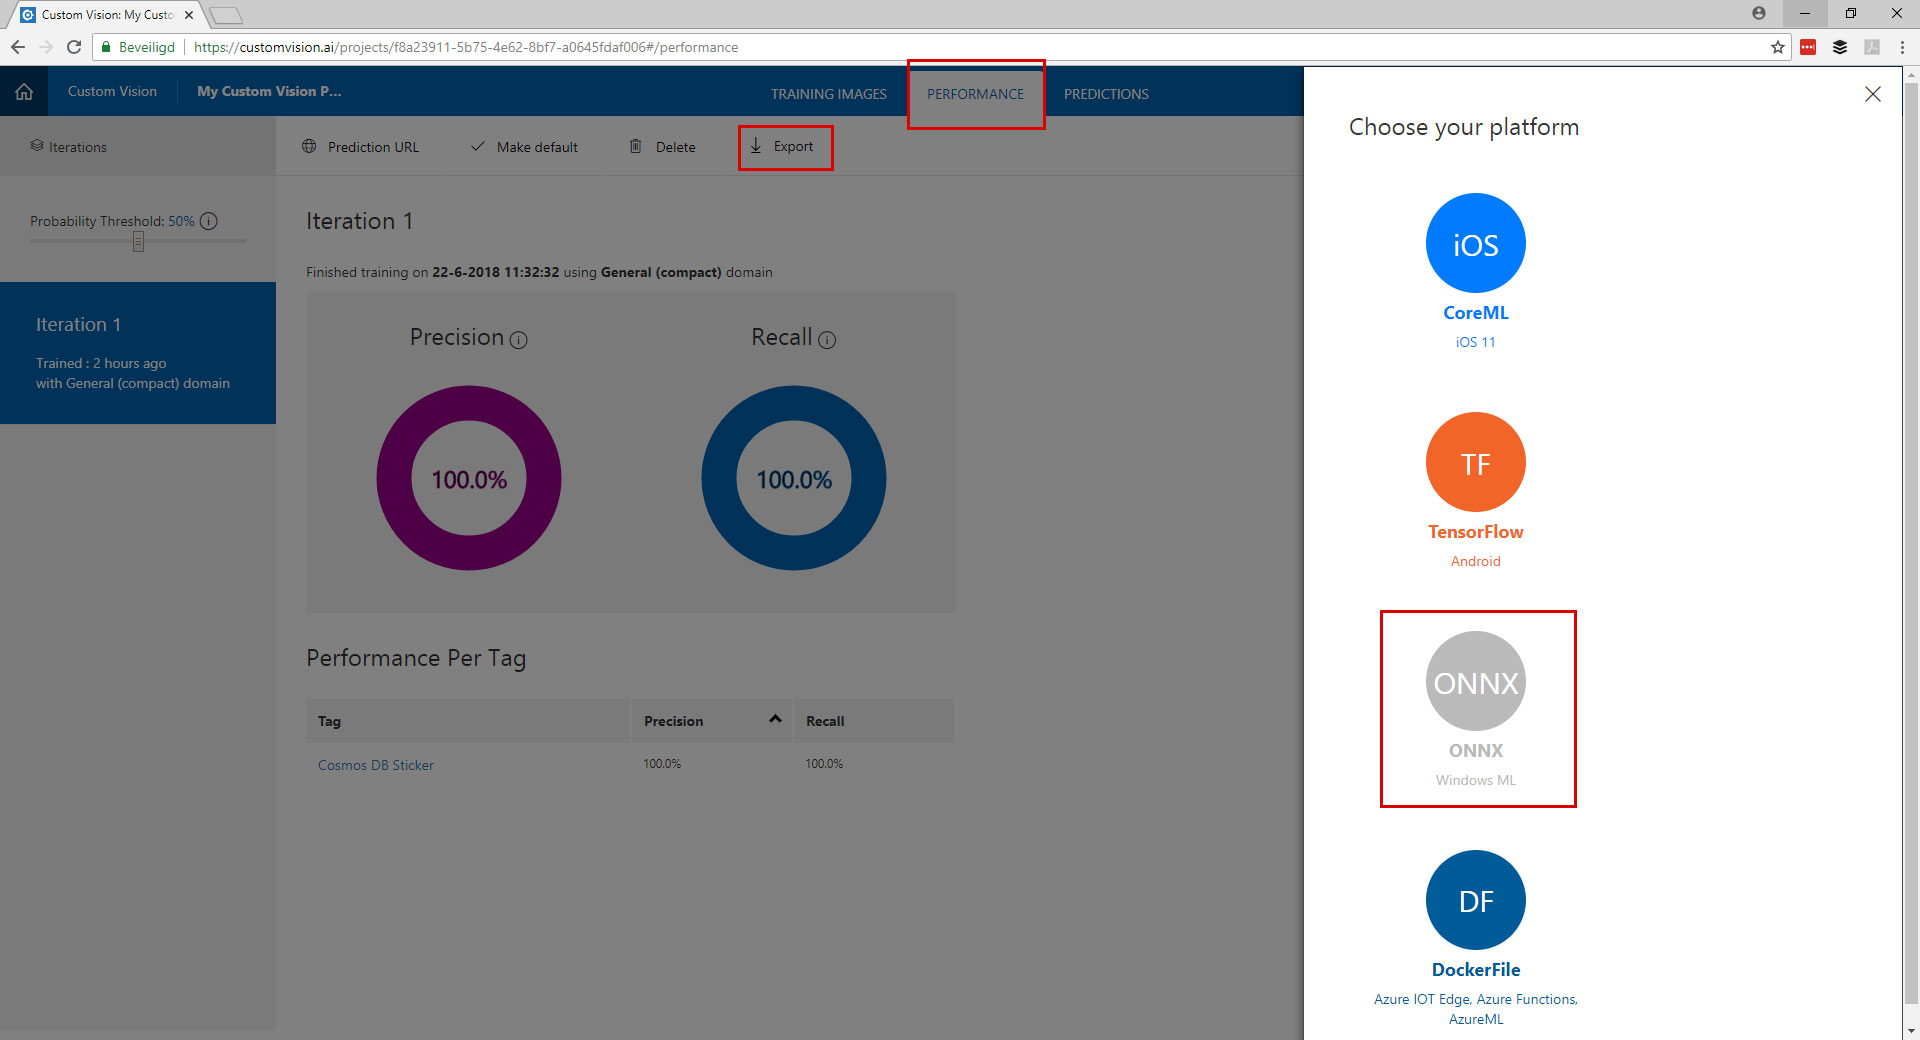
1.6 Export the model
If your model works with your test set of images it is time to export the model to run in offline.
- Open the tab "Performance"
- Click on "Export"
- Download the ONNX model
Part 2 - Build the UWP App
2.1 Create the app
- File > New Project
- Select: Visual C# > Windows Universal > Blank App (Universal App)
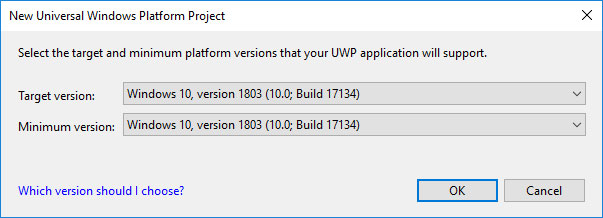
- Select: Build 17134 (If you don't see this version please go back to the requirements for this workshop)
2.2 The camera
2.2.1 Enable the Camera
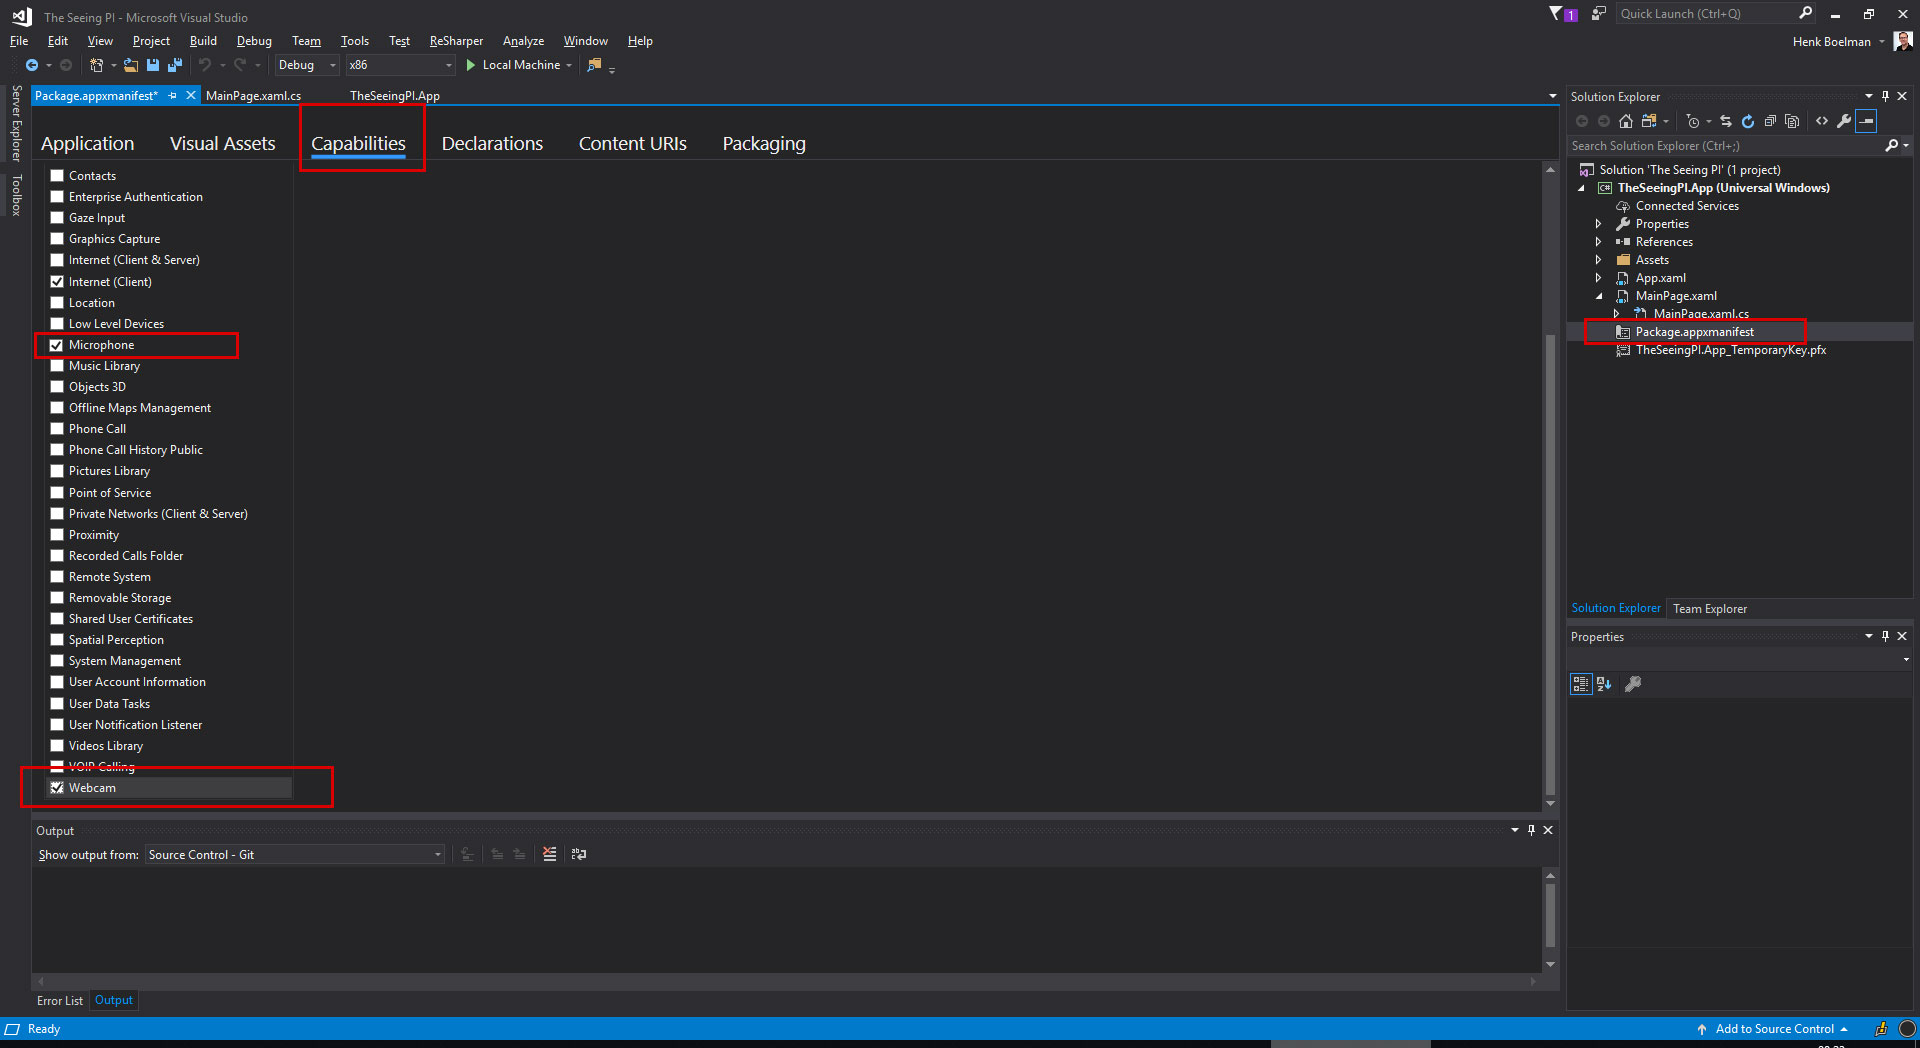
- Open the "Package.appxmanifest" file
- Open the tab: "Capabilities"
- Check the checkbox "Webcam & Microphone"
2.2.2 Showing the camera feed
- Open the file: "MainPage.xaml"
- Add the code below between the "grid" tags:
<StackPanel>
   <TextBlock x:Name="StatusText" FontWeight="Bold" TextWrapping="Wrap" Text="...."/>
   <CaptureElement Name="PreviewControl" Stretch="Uniform"/>
</StackPanel>
- Open the file: "MainPage.xaml.cs
- Add this code to the class: "MainPage"
private readonly DisplayRequest _displayRequest = new DisplayRequest();

private readonly MediaCapture _mediaCapture = new MediaCapture();

private async Task StartVideoPreviewAsync()
{
   await _mediaCapture.InitializeAsync();
   _displayRequest.RequestActive();

   PreviewControl.Source = _mediaCapture;
   await _mediaCapture.StartPreviewAsync();
}
- Call the StartVideoPreviewAsync method from the constructor
- Run the application and validate you can see the camera feed
2.3 ONNX Model
2.3.1 Import the model
- Rename the .onnx file you have downloaded in the previous step to "mycustomvision.onnx"
- Copy the customvisionmodel.onnx file to the Assets folder
- Goto Solution Explorer in Visual Studio
- Right click on the Assets Folder > Add > Existing Item > Select the "mycustomvision.onnx" file and click add.
- In the properties from the "mycustomvision.onnx" set:
Build Action: Content Copy to output: Copy if newer - Verify that you have a new file in the root of your project called: "mycustomvision.cs"
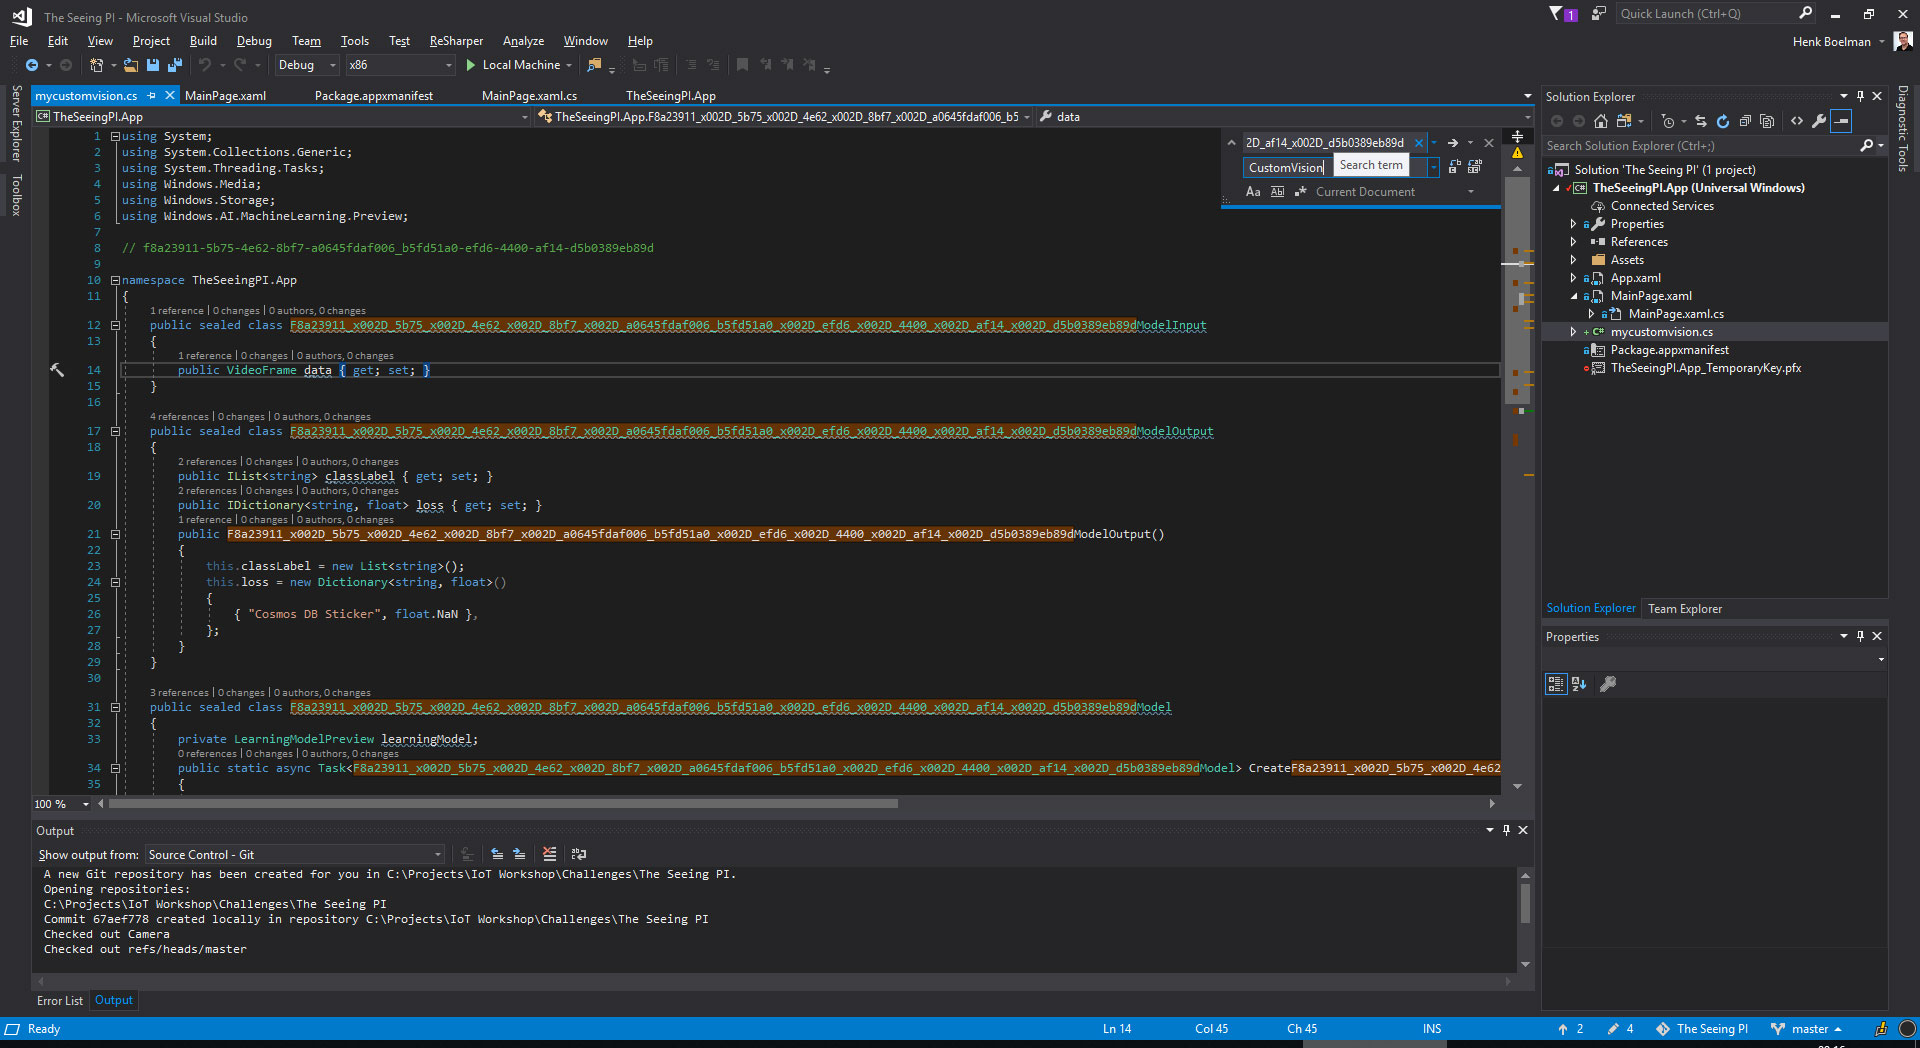
- Open the file and replace the generated code: "F8a23911_x002D_5b75_x002D_4e62_x002D_8bf7_x002D_a0645fdaf006 _b5fd51a0_x002D_efd6_x002D_4400_x002D _af14_x002D_d5b0389eb89dModelInput" to public sealed class MyCustomVisionModelInput
- Have a look at the "MyCustomVisionOutput" method and notice that you see your tags there, if your model changes you have to add or remove your new tags here.
2.3.2 Load the model
- Open the file: "MainPage.xaml.cs
- Add this code to the class: "MainPage"
private string _modelFileName = "mycustomvision.onnx";

private MyCustomVisionModel _model = null;

private async Task LoadModelAsync()
{
   await Dispatcher.RunAsync(CoreDispatcherPriority.Normal, () => StatusText.Text = $"Loading {_modelFileName}");

   var modelFile = await StorageFile.GetFileFromApplicationUriAsync(new Uri($"ms-appx:///Assets/{_modelFileName}"));
   _model = await MyCustomVisionModel.CreateMyCustomVisionModel(modelFile);

   await Dispatcher.RunAsync(CoreDispatcherPriority.Normal, () => StatusText.Text = $"Loaded {_modelFileName}");
}
- Call the LoadModelAsync method from the constructor
- Run the application and validate that the model is loaded
2.4 Analyze the camera feed
2.4.1 Grabbing the frames from the camera
- Open the file: "MainPage.xaml.cs
- Add this code to the class: "MainPage"
private readonly SemaphoreSlim _frameProcessingSemaphore = new SemaphoreSlim(1);

private ThreadPoolTimer _frameProcessingTimer;

public VideoEncodingProperties VideoProperties;
- Add this lines to the "StartVideoPreviewAsync" method
TimeSpan timerInterval = TimeSpan.FromMilliseconds(66); //15fps
_frameProcessingTimer = ThreadPoolTimer.CreatePeriodicTimer(new TimerElapsedHandler(ProcessCurrentVideoFrame), timerInterval);
VideoProperties = _mediaCapture.VideoDeviceController.GetMediaStreamProperties(MediaStreamType.VideoPreview) as VideoEncodingProperties;
- Add this method:
private async void ProcessCurrentVideoFrame(ThreadPoolTimer timer)
{
   if (_mediaCapture.CameraStreamState != Windows.Media.Devices.CameraStreamState.Streaming || !_frameProcessingSemaphore.Wait(0))
   {
       return;
   }

   try
   {
       using (VideoFrame previewFrame = new VideoFrame(BitmapPixelFormat.Bgra8, (int)VideoProperties.Width, (int)VideoProperties.Height))
       {
           await _mediaCapture.GetPreviewFrameAsync(previewFrame);

           // Evaluate the image
           await Dispatcher.RunAsync(CoreDispatcherPriority.Normal, () => StatusText.Text = $"Analyzing frame {DateTime.Now.ToLongTimeString()}");

       }
   }
   catch (Exception ex)
   {
       Debug.WriteLine("Exception with ProcessCurrentVideoFrame: " + ex);
   }
   finally
   {
       _frameProcessingSemaphore.Release();
   }
}
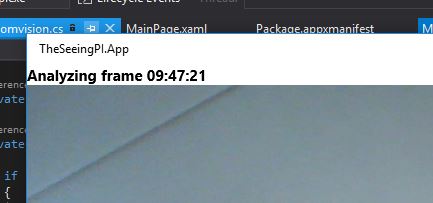
- Run the application and validate that every second a frame is analyzed
2.4.2 Scoring the frames
- Open the file: "MainPage.xaml.cs
- Add this code to the class: "MainPage"
private async Task EvaluateVideoFrameAsync(VideoFrame frame)
{
   if (frame != null)
   {
       try
       {

           MyCustomVisionModelInput inputData = new MyCustomVisionModelInput
           {
               data = frame
           };
           var results = await _model.EvaluateAsync(inputData);
           var loss = results.loss.ToList().OrderByDescending(x => x.Value);

           var lossStr = string.Join(",  ", loss.Select(l => l.Key + " " + (l.Value * 100.0f).ToString("#0.00") + "%"));
           var message = $" Predictions: {lossStr}";

           await Dispatcher.RunAsync(CoreDispatcherPriority.Normal, () => StatusText.Text = message);
           Debug.WriteLine(message);

           // Insert Lines for SPI Display here
       }
       catch (Exception ex)
       {
           Debug.WriteLine($"error: {ex.Message}");
       }
   }
}
- In the "ProcessCurrentVideoFrame" method replace:
// Evaluate the image
await Dispatcher.RunAsync(CoreDispatcherPriority.Normal, () => StatusText.Text = $"Analyzing frame {DateTime.Now.ToLongTimeString()}");
with
await Task.Run(async () =>
{
   await EvaluateVideoFrameAsync(previewFrame);
});
- Run the application and validate that you see the classification of every frame, you can hold the objects in front of the camera an see if it is working.
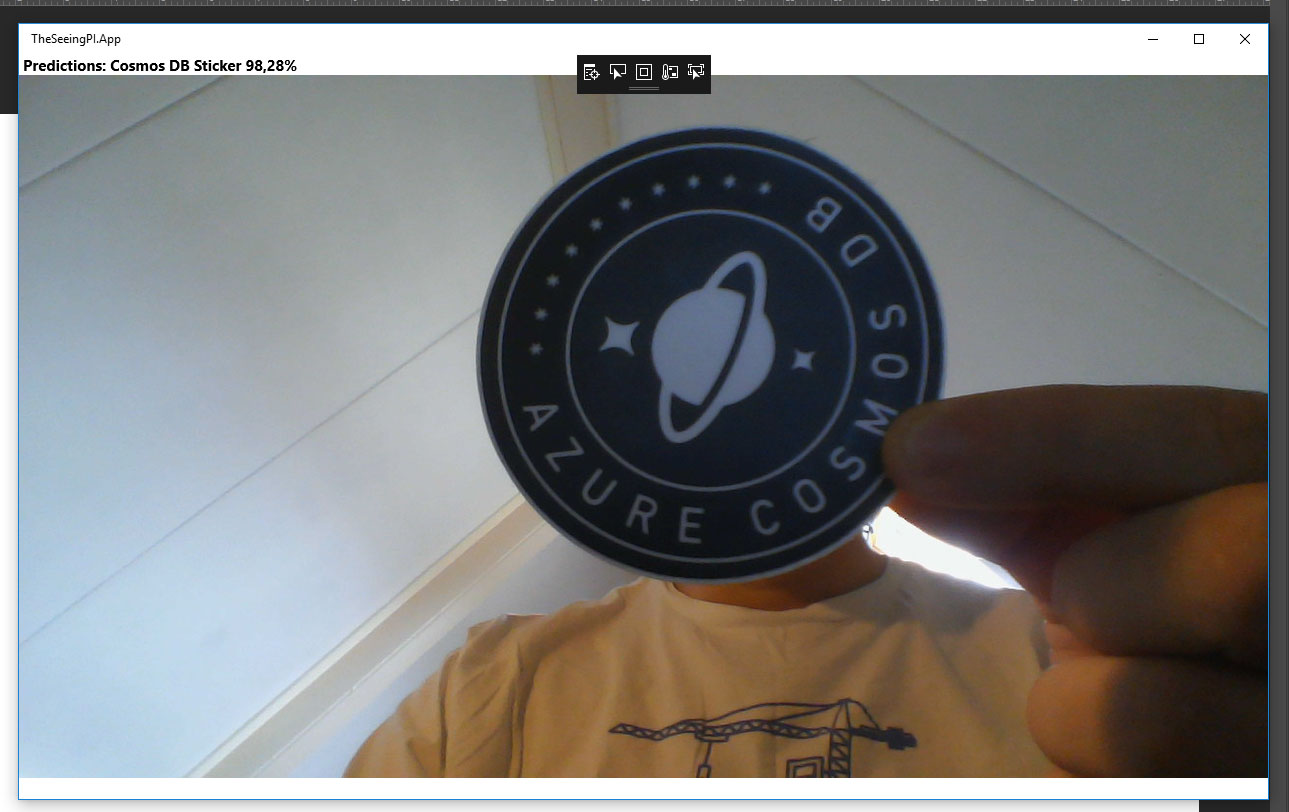
You application should look like this now
Part 3 - Run it on the RaspBerry PI 3
3.1 INTRO FOR RASPBERRY
[TODO]
3.2 Display the result on the SPI display
- Add the SPIDisplay module to your project. View module
- Open the file: "MainPage.xaml.cs
- Add this code to the class: "MainPage"
private readonly SPIDisplay _spiDisplay = new SPIDisplay();
- Add the follow lines to the constructor:
_spiDisplay.InitAll();
- Replace "// Insert Lines for SPI Display here" in the "EvaluateVideoFrameAsync" method with:
List<string> linesToDisplay = loss.Take(4).Select(a => $"{a.Key} {(a.Value * 100.0f):#0.00}%").ToList();
_spiDisplay.WriteLinesToScreen(linesToDisplay);
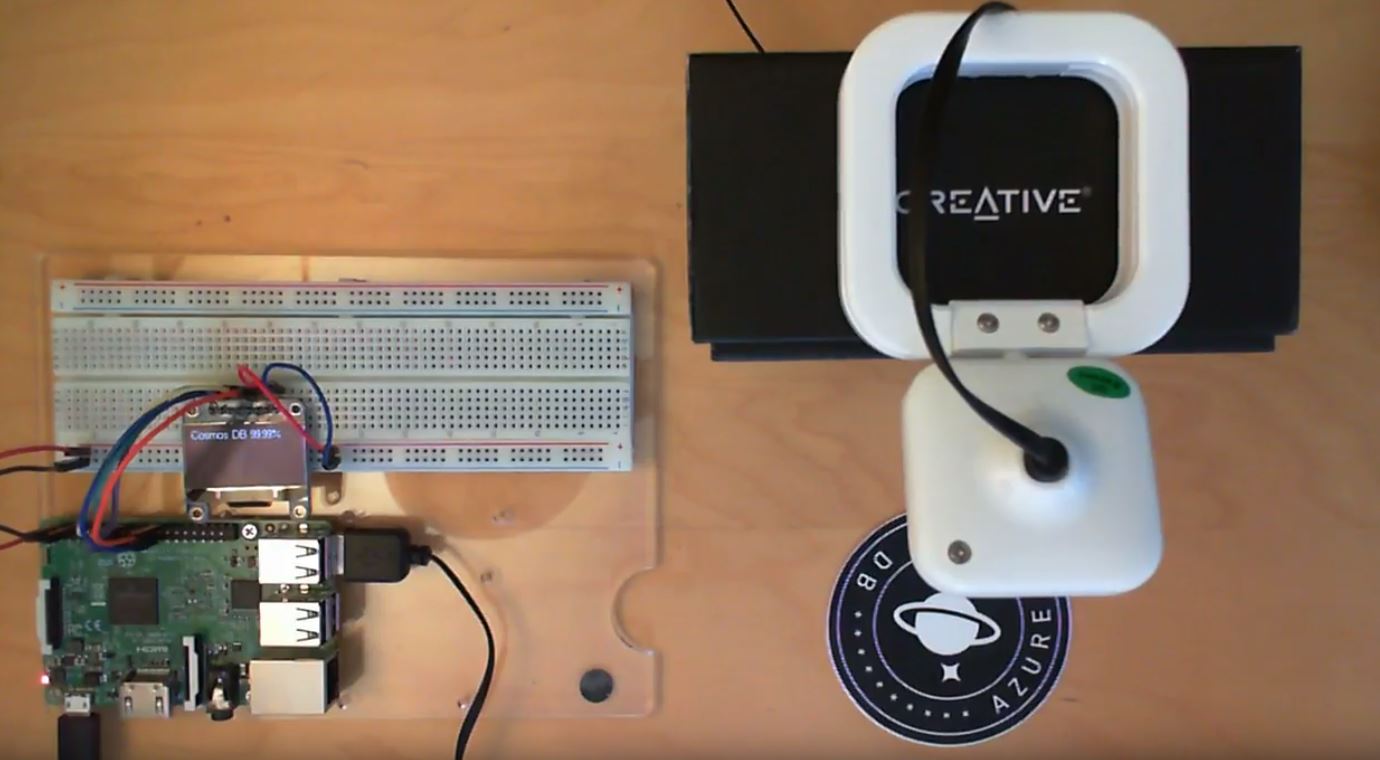
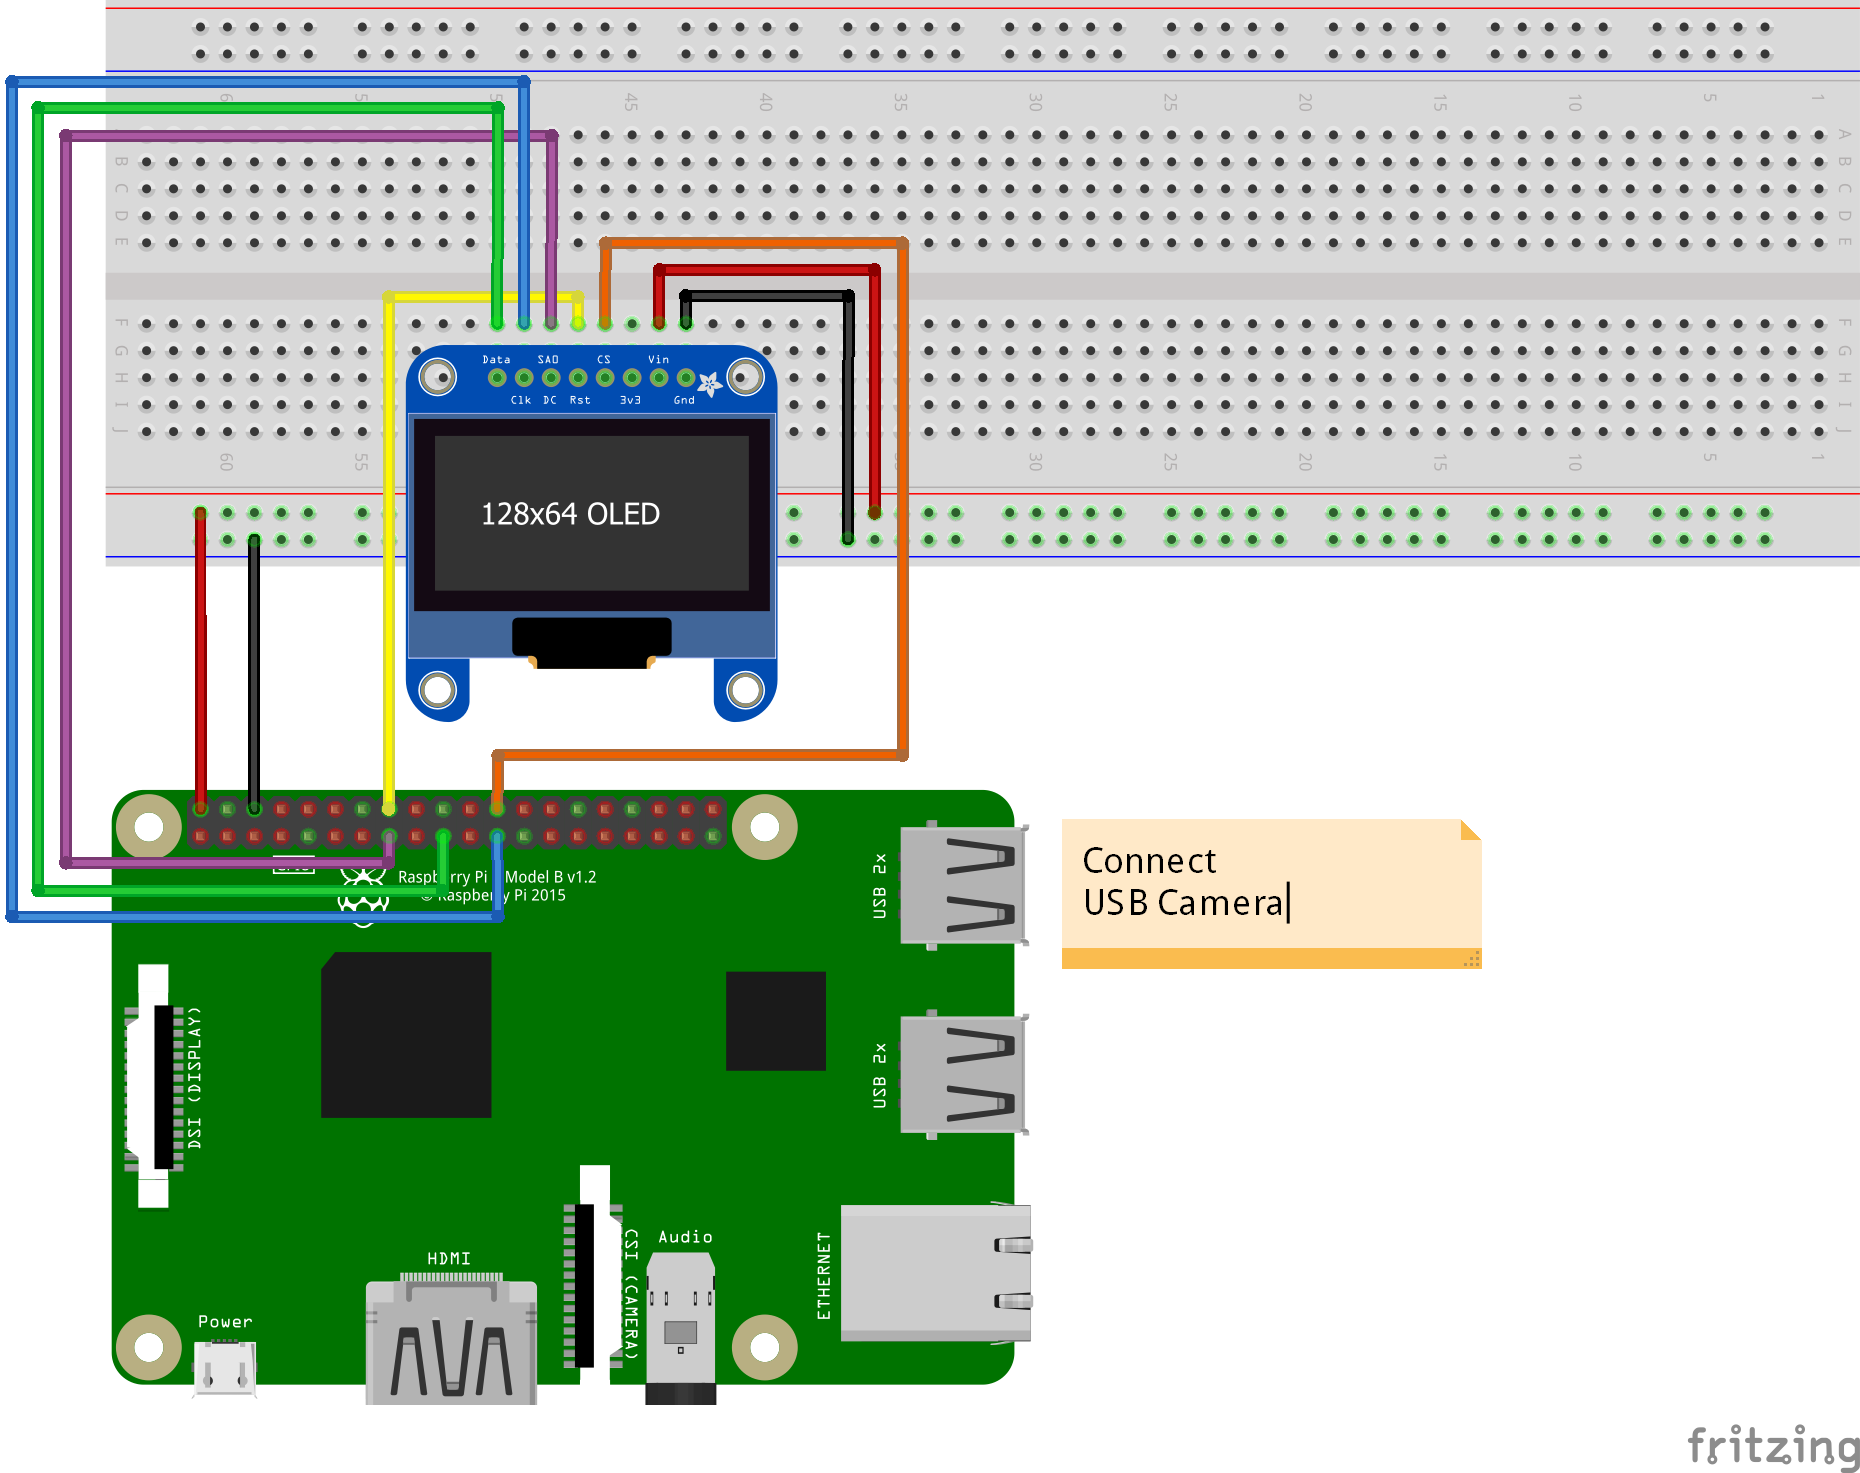
3.2 Connect the display to the RaspBerry
Connect all the wires exactly the same as in the schema below.
Don't forget to remove the power
3.3 Run it on de device
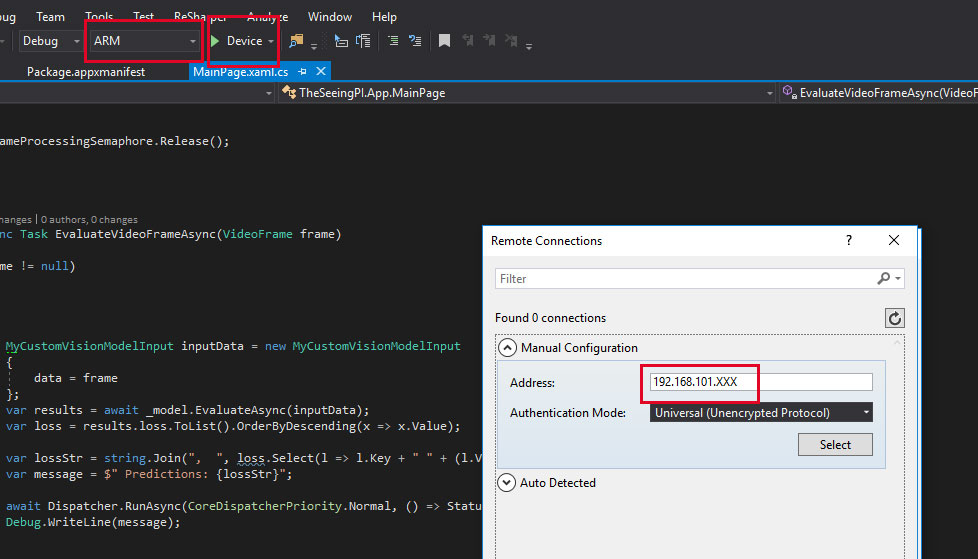
- Select by debug the ARM profile
- Select "Device"
- Type the IP address of your Raspberry PI
- Select by protocol "Windows Universial"
- Click select
- Click the green play button to debug your solution on the PI
The first time it can take a while to deploy, so this is a good time for some coffee!