Object detection with Microsoft Custom Vision
Last year Custom Vision was released to classify your own objects on images. Yesterday at Build 2018 a new Project Type was added to enable Object Detection in images. In this blog we are going to take a closer look and see what this new feature can do.
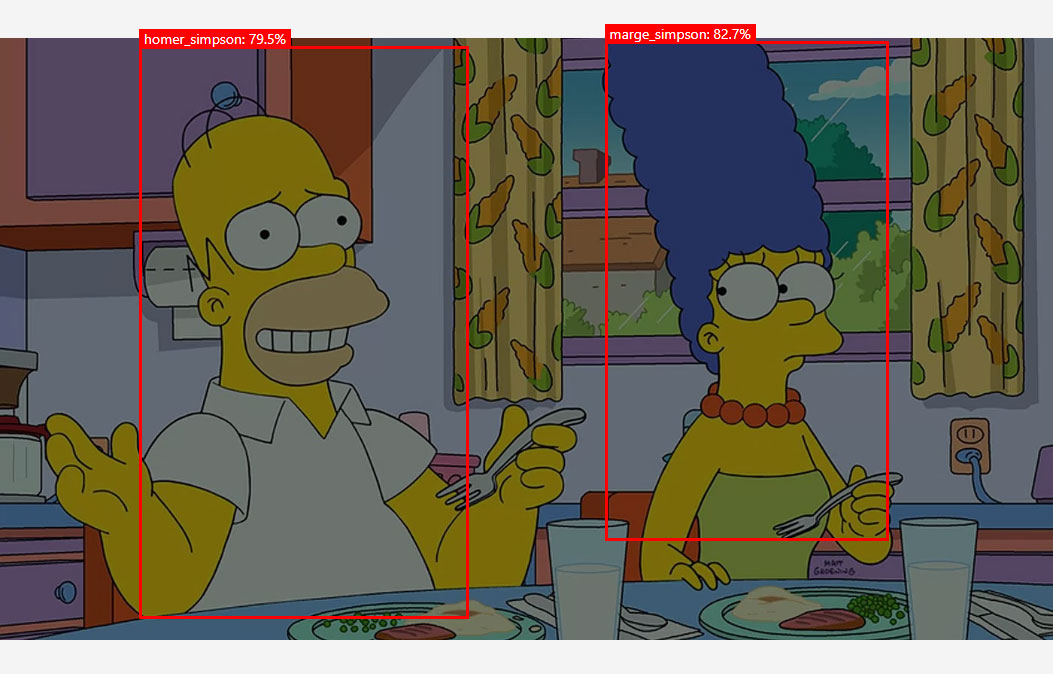
Detect multiple objects in an image and draw boxes around these objects.
More updates in Custom Vision:
But there was more announced for the Custom Vision Service:
- The S0 tier got an update, it is now possible to have 250 tags and 50.000 images.
- You can now export your model to a Dockerfile. With this you can host your own model in your own Docker container.
- You can besides export your model to CoreML, Tensorflow export it to ONNX and use it with Windows ML.
Create an Object detection project
As for every Machine Learning project you need a dataset, Kaggle is a great resource for that and I have downloaded The Simpsons dataset. This dataset contains around 7000 images including a CSV file with the coördinates where they are on the pictures.
Download The Simpsons Image dataset
Now that we have some training data we can go to customvision.ai and create a new project.
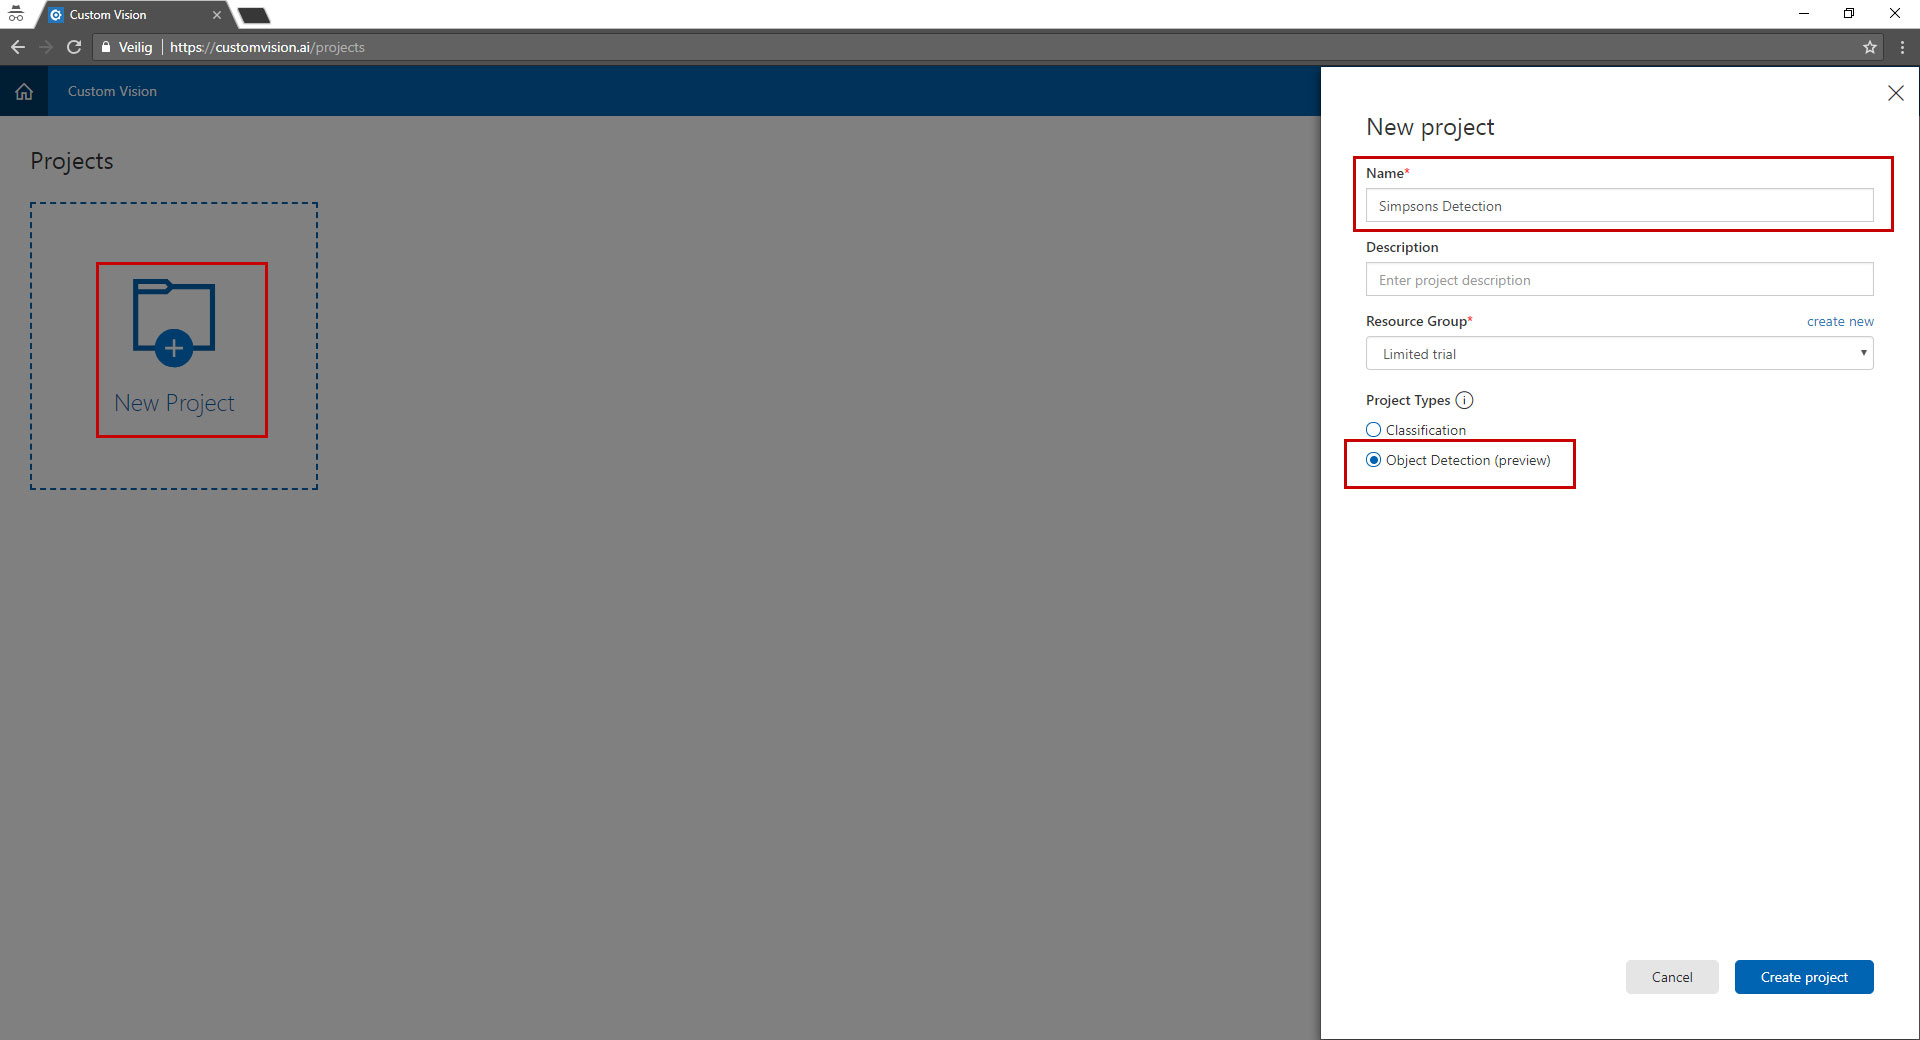
Select by type "object detection" and give your project a name to remember.
Upload images
Now we have a project we can upload images to the project. This images are used to train the model. So make sure the quality of the images is good.
For every object you want to detect you need a minimum of 15 images, the more the images the better your model gets.
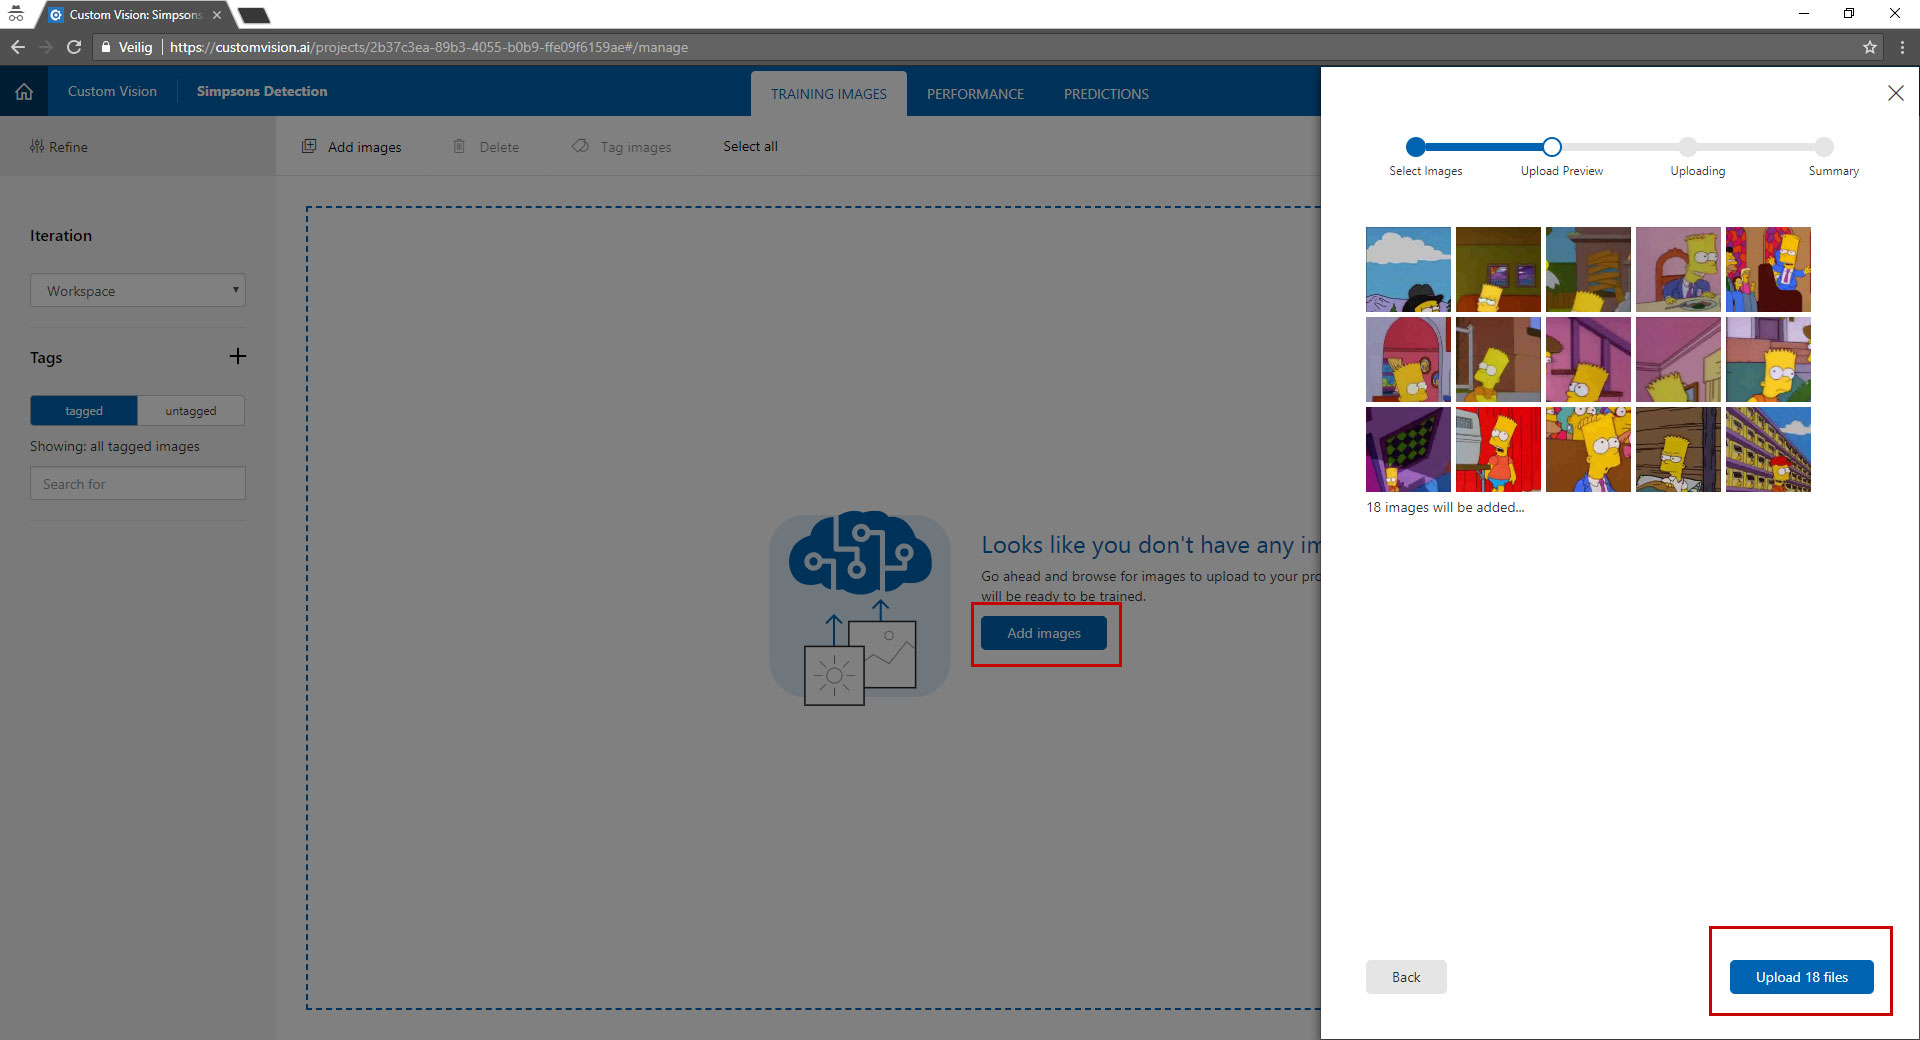
Notice that there is no option to tag the images during upload.
Tag the objects in the images
When you have uploaded some images you can start tagging the objects in images.
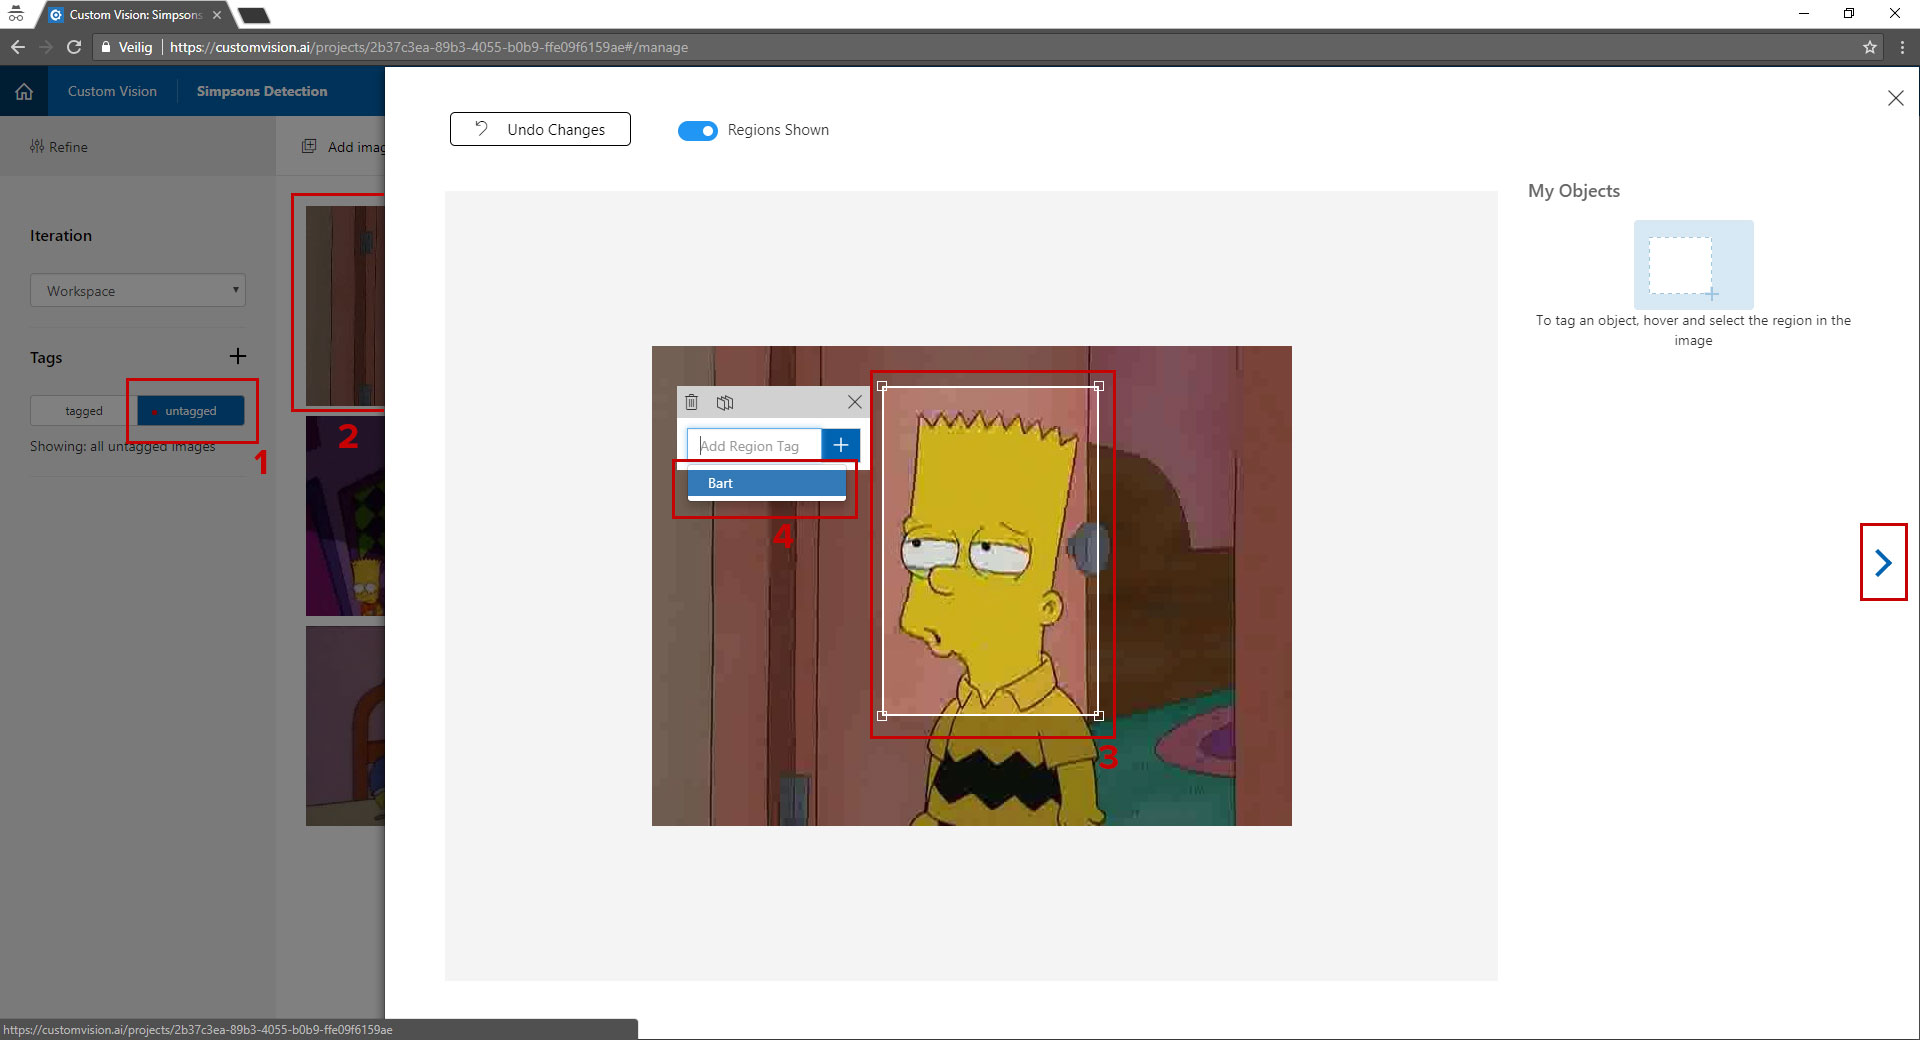
This is done in a few simple steps:
- Left click on the "untagged" button, after clicking it you see the images appear on the right.
- Click the first images, you will see a screen like on the image above.
- You can now drag an rectangle around the object.
- When the rectangle is in place you can either select a tag from the dropdown or add one by clicking the + button.
- To go to the next image press the right arrow and repeat this process for all the images uploaded.
Training the model
Now your data is tagged, it is time to train the model. This is done by simply pressing the green "train" button. The training can take a few minutes and because this is still in preview you only have 10 training rounds, so use them wisely.
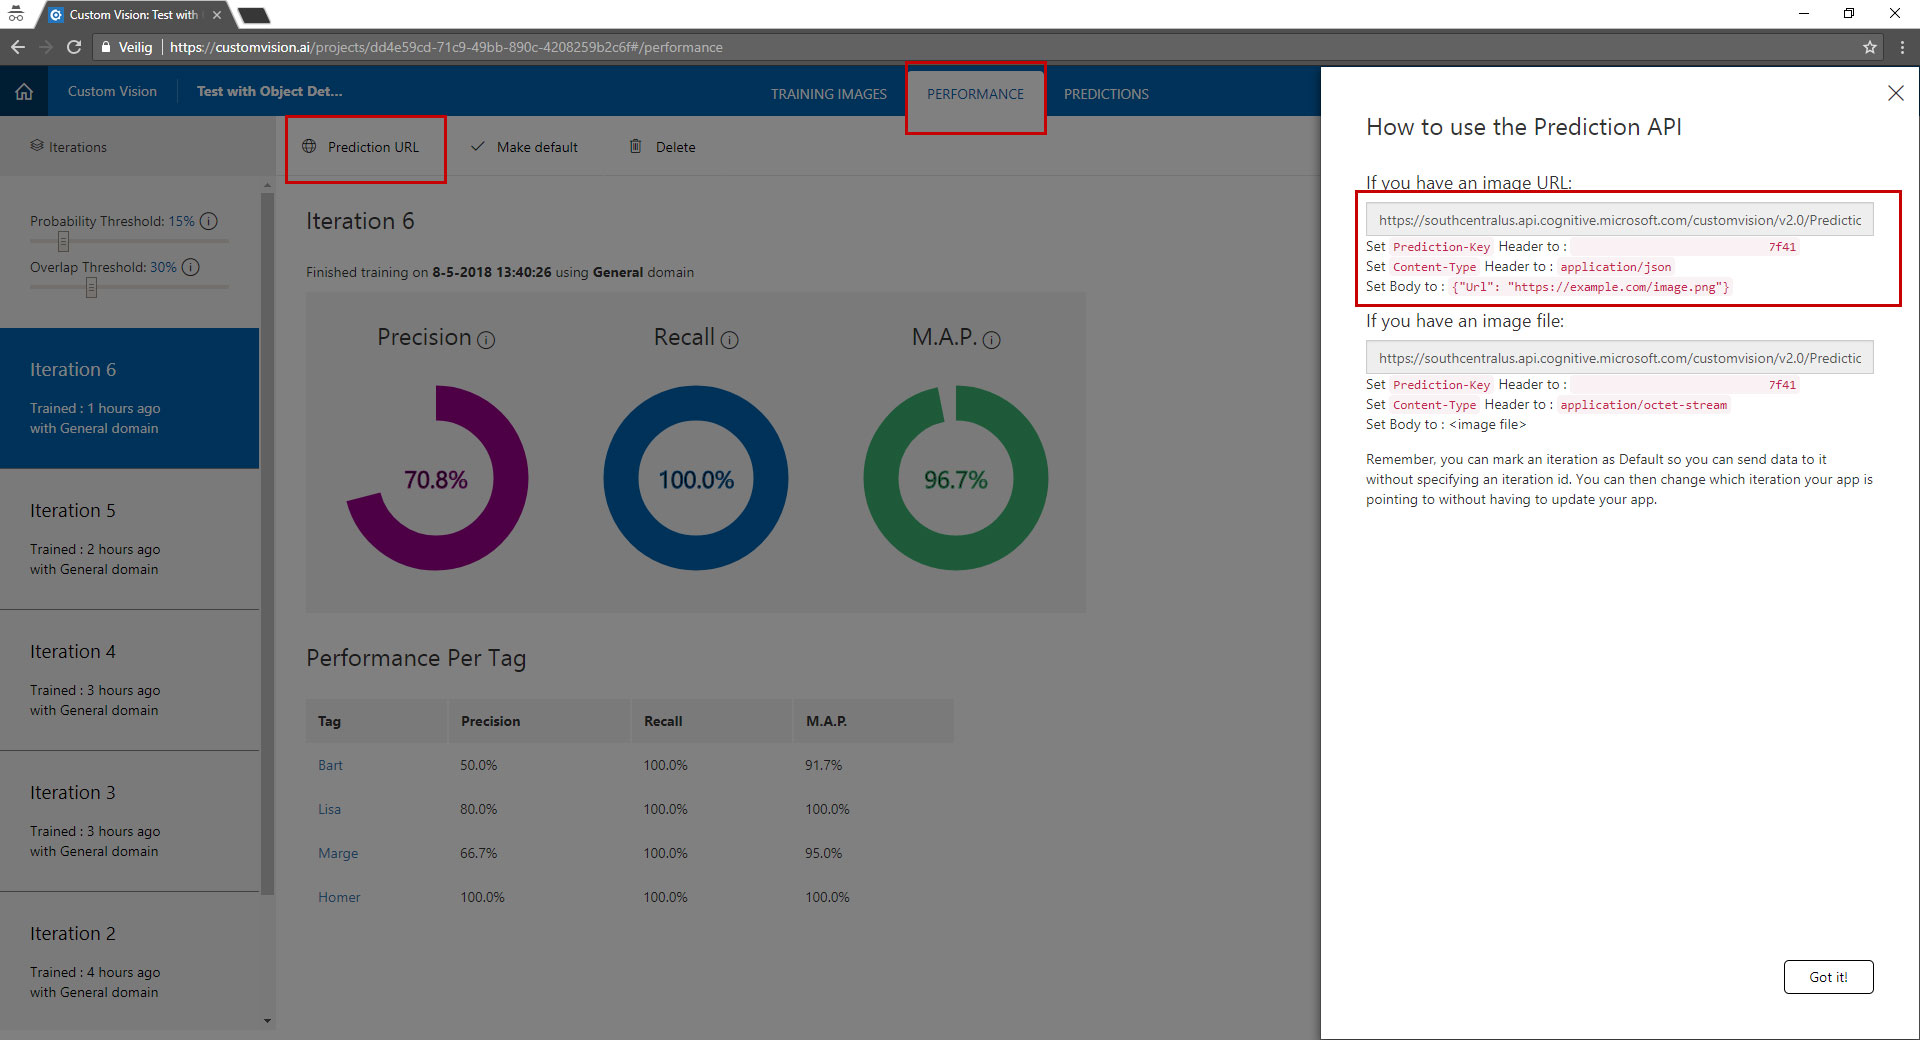
The results of your training can be found under the "performance tab".
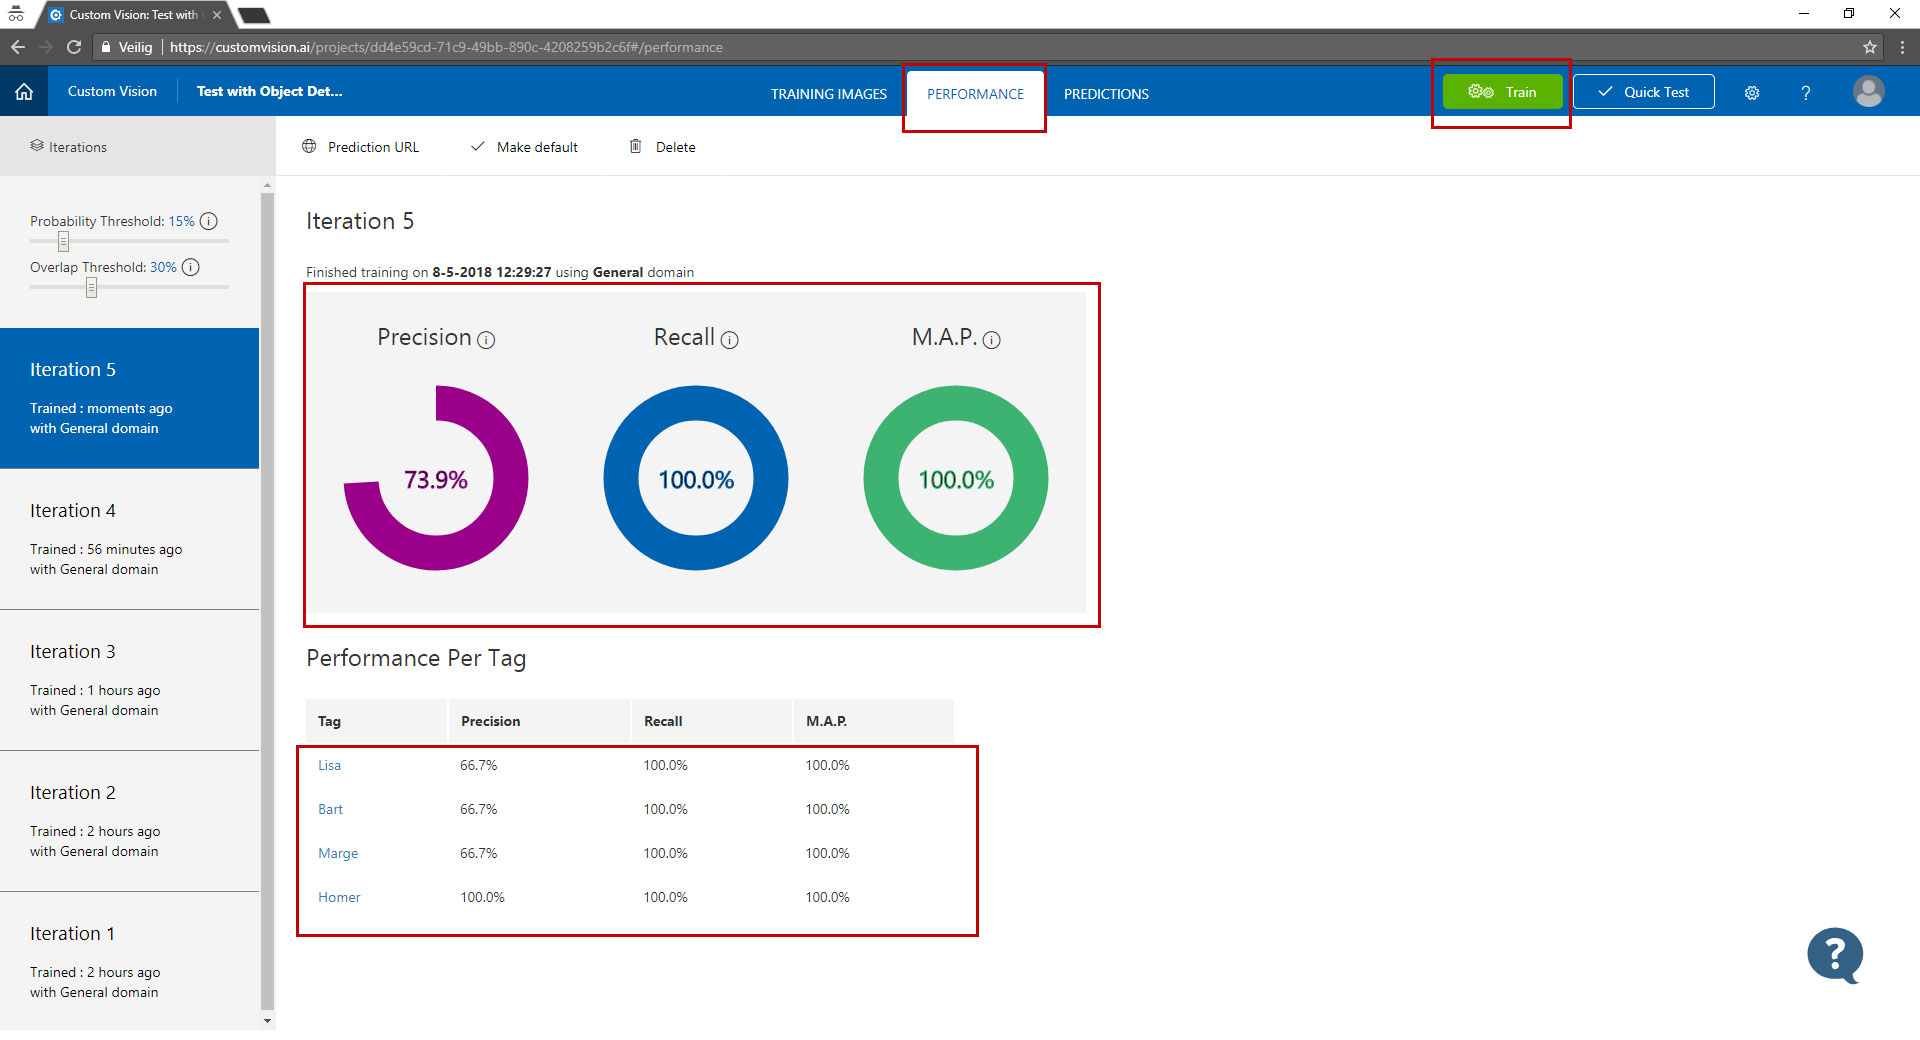
Here you can see the performance of your model. The higher the percentage the better your model is. You can also drill into the results by clicking on one of the tags under "performance per tag". Here you can see what your model detected against what you have selected in the image.

Testing your model
Before you want to publish your model or use it in an application there is the ability to test it. You can just upload an image or provide a link and get the results back in the customvision.ai portal.

Click in the top right on the "quick test" button.
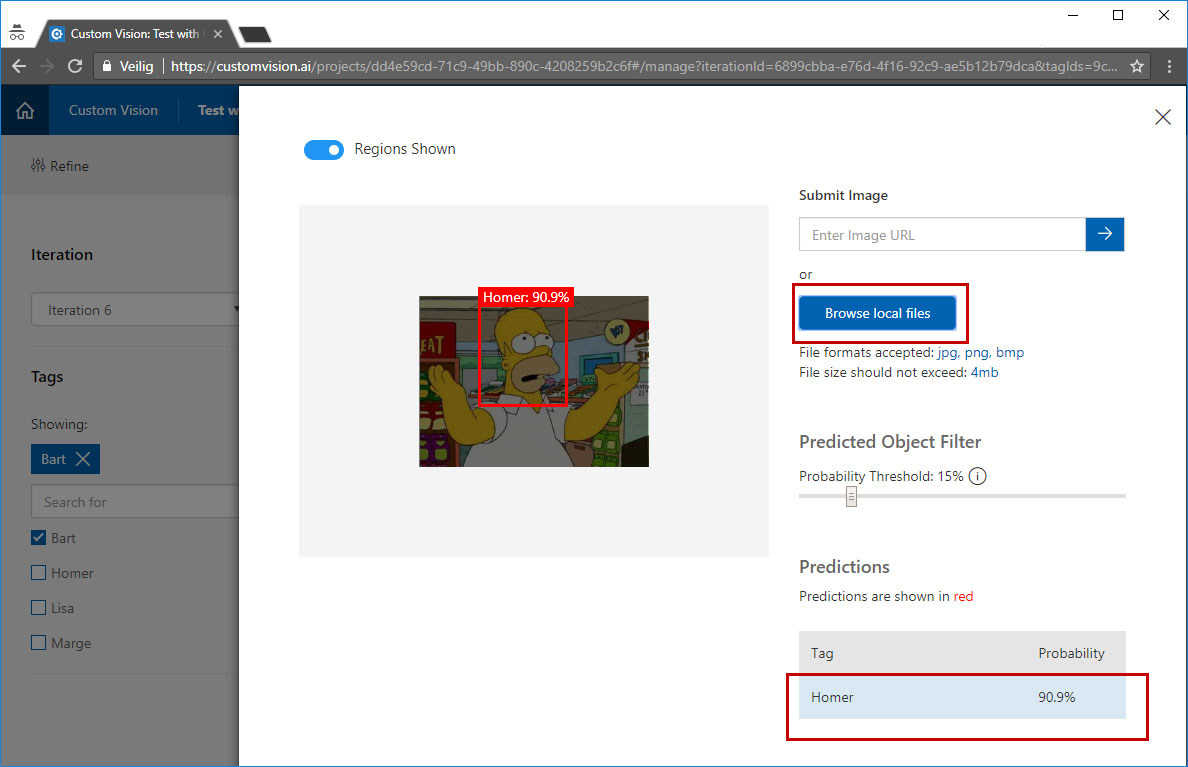
Select an image that has not been used to train the model and upload it, wait a few seconds you will see the results on the screen.

Using the model in your applications
The object detection feature is still in preview, so it is not production ready. But for development and testing there is an API available that you can use. It is not yet possible to export this model to CoreML or Tensorflow.
You can find the API if you go to the tab "Performance" and the click prediction URL.
Using the SDK
The SDK's for training and predictions are available in preview and there is a simple example from Microsoft that explains how to use them.
- Microsoft example
- Microsoft.Azure.CognitiveServices.Vision.CustomVision.Training
- Microsoft.Azure.CognitiveServices.Vision.CustomVision.Prediction
Summary
I have been playing around with this service only for a few hours and I managed to get amazing results from just uploading a few images and by selecting the object in these images.
I can't wait to see this evolving and become globaly available, useable on large datasets and having the ability to be exported to CoreML or a DockerFile.